
Svg editor
How to Make an SVG File for Cricut in Illustrator
Oct
Creating SVG files for Cricut using Adobe Illustrator is a common need for crafters and designers. If you’d like guidance or a tutorial on how to make SVG files for Cricut in Illustrator, please let me know, and I’ll be happy to provide you with the necessary steps and instructions.
What Are SVG Files for Cricut?
So you may be wondering, what is SVG for Cricut and why should I use it? SVG (Scalable Vector Graphics) is a type of graphic file which stores vector data. This means that SVG images for Cricut can be scaled to any size. This is especially handy when using our Cricut Machine as SVGs are just a single file we can import. The SVG will retain all vector layer data.
Why Make SVG Images for Cricut With Illustrator?
Illustrator is a vector art program, so it’s an amazing tool for creating scalable art. You can create your own designs, and it’s even possible to convert an image to SVG in Illustrator. When you export to SVG from Illustrator, all of your layers will be retained in Cricut Design Space.
How to Make an SVG File in Illustrator
Step 1
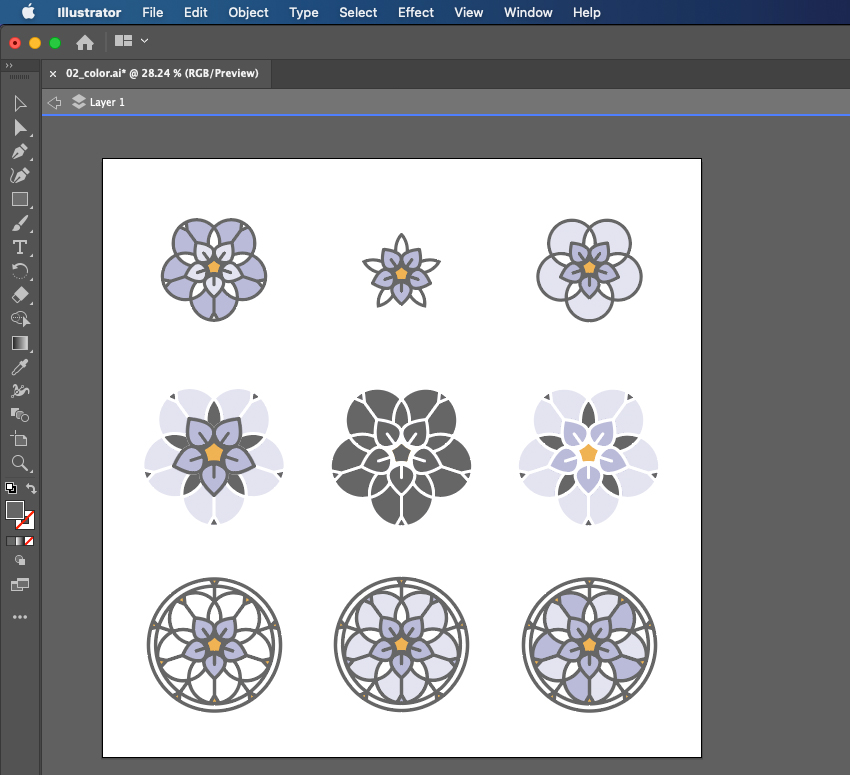
Open up the project file for your project. We will be using the color version of the flowers.
Step 2
We only want to use one of the flowers for our SVG file, so we will have to edit the project file. For this project we want to create an SVG out of the top-left flower. Let’s go ahead and delete the icons we don’t need.
Using the Move Tool, click on each of the flowers we don’t need and press Delete.
Step 3
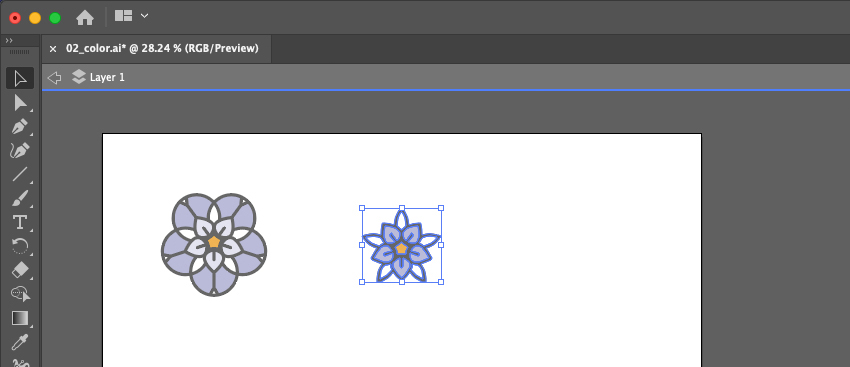
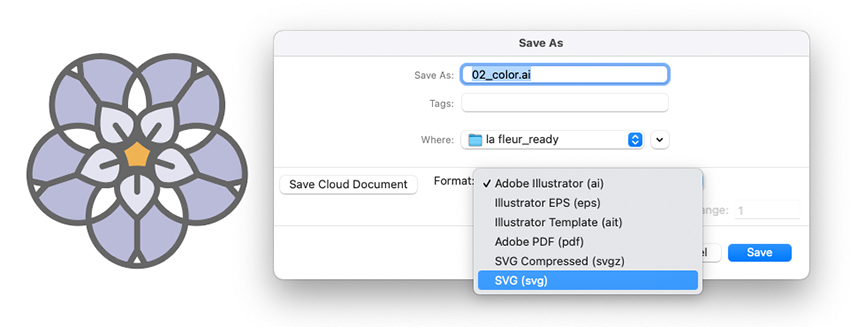
Now that we have the project with all the elements we want, we can now go ahead and save as an SVG.
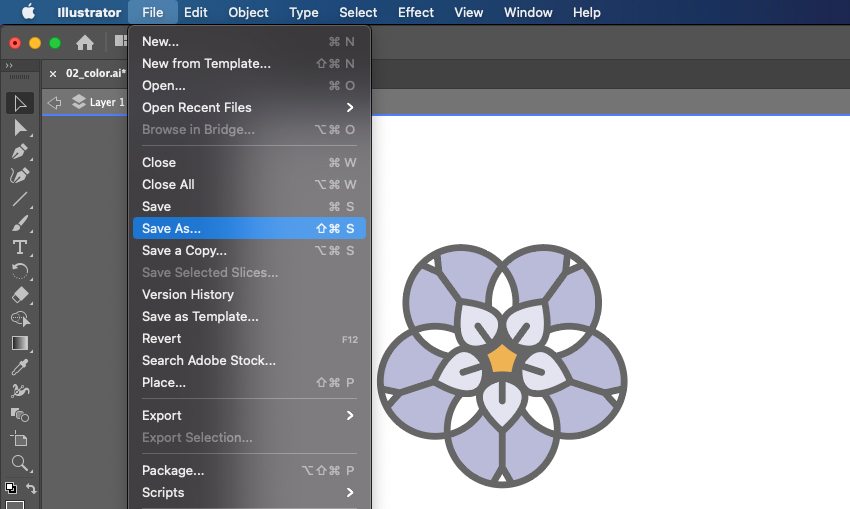
Go to File > Save As.
Step 4
From the format dropdown, select SVG.
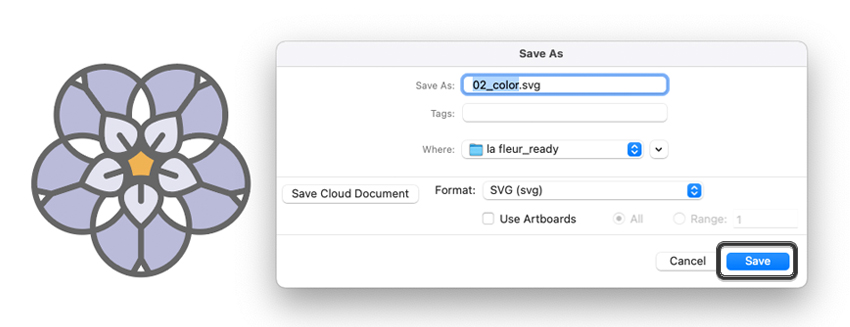
Step 5
Now go ahead and click Save.
Step 6
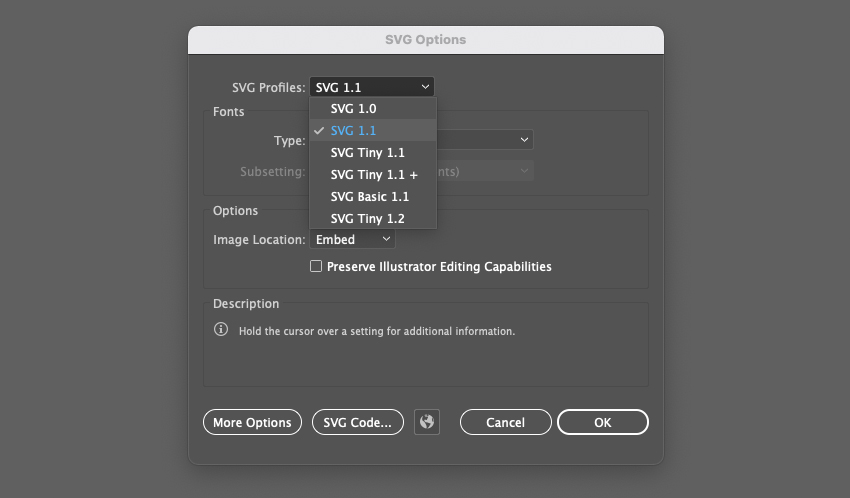
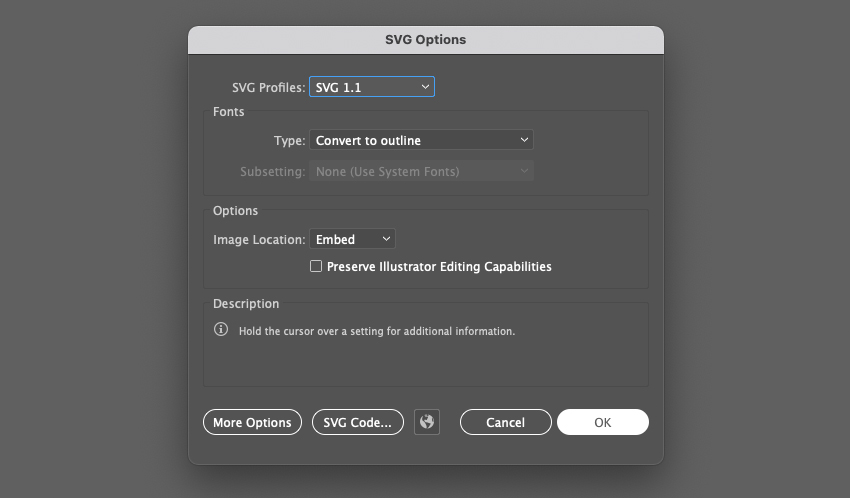
This will open the SVG options.
For SVG Profiles, select SVG 1.1.
Step 7
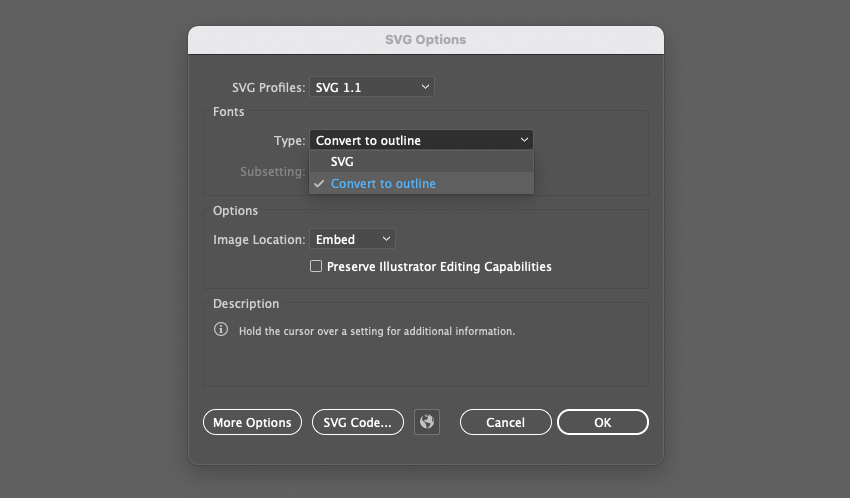
Next, let’s move to the font options. If your artwork contains typography, you will want to select Convert to outline. This will ensure that people who view your SVG won’t be required to have the font installed.
Select Convert to outline for this option.
Step 8
For Image Location, we will want to select Embed. This setting determines how the SVG handles external images. Embedding will ensure that any linked images are included in a single SVG file, which is what we need for Cricut.

Step 9
These are all the settings we need for the purposes of creating an image for Cricut. Go ahead and click OK.
Great work! You have now created a vector project in Adobe Illustrator and learned how to make SVG files for Cricut. Next, let’s take a look at how to upload an SVG to Cricut Design Space.