
DIY Tips
How To Make DIY Print T-Shirts With Iron-on Transfer Paper

10
Jun
Jun
Welcome to the world of DIY print t-shirts with iron-on transfer paper! Get ready to unleash your creativity and transform ordinary shirts into personalized works of art. Whether you’re looking to express your individual style, make a statement, or create custom gifts for friends and family, this guide is here to inspire and guide you through the process. With a few simple materials and a dash of imagination, you’ll be amazed at what you can achieve. So, roll up your sleeves, grab your iron-on transfer paper, and let’s dive into the exciting world of DIY print t-shirts!
Supplies You’ll Need To Get Started
- A pack of Canon’s Iron-on Transfer Paper. Be sure to choose the pack that best suits the color fabric you are going to iron your design onto – there’s a pack for light fabrics and another for dark fabrics
- A design that you want to print and iron onto your t-shirt. This can be anything from your favorite photo to your favorite poem. There’s really no limit to what you can print!
- An iron and ironing board (or table).
- Scissors.
- A Canon Pixma printer
Instructions
Step 1 – Choose a Custom Design to Print for Your T-Shirt
- The great thing about Canon’s Iron-on Transfer Paper is that you can use it to print pretty much any design you can imagine. Design a graphic yourself or head over to the website freesvgfilescricut.com, where you’ll find tons of imaginative designs and inspiration to download and print out.
Step 2 – Print Your Custom T-Shirt Design
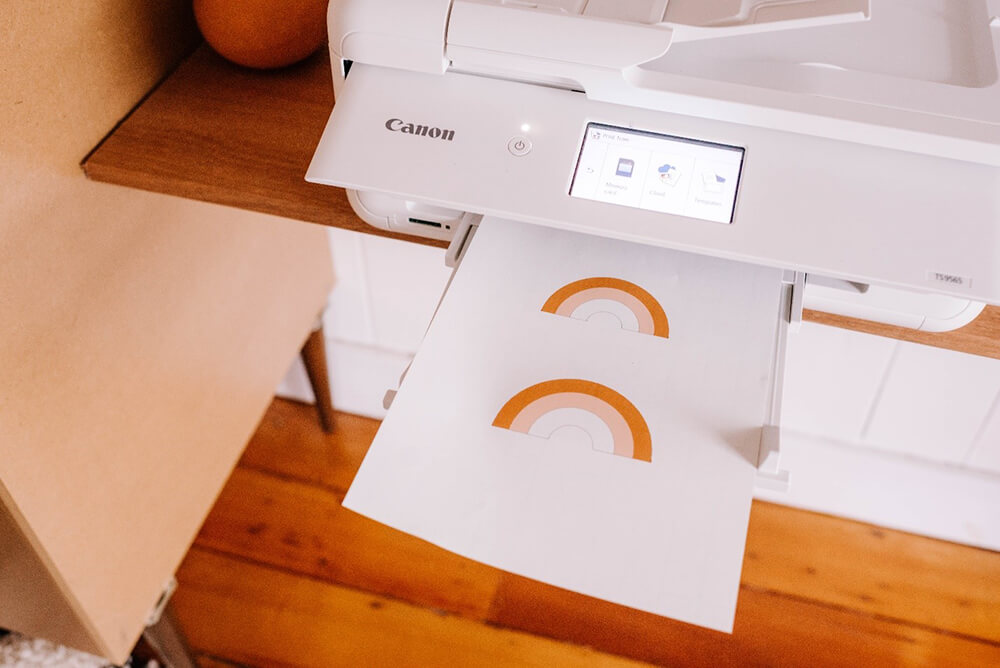
- Now for the exciting bit! Once you’ve picked a design to print for your t-shirt, simply load the Canon Iron-on Transfer Paper into the Canon Pixma printer, check your settings and press ‘Print’. You’ll soon see your custom t-shirt design come to life as it is printed directly onto the transfer paper. Using your scissors, cut out your design while being careful to stay as close to the edges as possible without cutting into the design itself.
Step 3 – Iron Your Custom Design onto Your T-Shirt
- Clear a space so that you’re ready to start ironing your design onto your t-shirt. You can use an ironing board or any other table, whether it be in your kitchen, dining room or office. If you do not use an ironing board, just be sure to lay down a sheet of cloth to protect your table, as well as a few sheets of paper to place under your t-shirt as you begin to iron.
- Lay your t-shirt down and flatten it out so that the fabric lays flat without being too stretched. Then place your design exactly where you would like it to be and place a piece of the parchment paper (included in your Canon Iron-on Transfer pack) over the top of it.
- Now it’s time to start ironing! Be sure to press down firmly on your iron so that your design transfers and bonds properly with the fabric of your t-shirt. Once your graphic is fixed firmly to your t-shirt, lay the t-shirt flat and leave it to cool.
Step 4 – Admire Your Handy Work
- Your fully customized t-shirt is now ready to wear and show off! Or why not make more matching t-shirt designs to give to friends and family? Don’t be afraid to get creative and play around with different ideas – craft printing is a seriously fun and versatile way to customize your clothes and inject your wardrobe with colorful hints of your personality.