
DIY Tips
A Guide to Crafting Homemade Soap
Jun
Welcome to our guide on “How to Make Homemade Soap”! If you’ve ever wanted to create your own custom soaps, this tutorial is your gateway to the wonderful world of soap-making. Crafting homemade soap allows you to tailor the ingredients, scents, and designs to your preferences, resulting in unique and luxurious bars that are gentle on your skin. In this comprehensive guide, we will take you through the step-by-step process of soap-making, from selecting the right oils and additives to mastering the art of blending fragrances and molding the soap bars. Whether you’re a beginner or an experienced soap-maker, this guide will provide you with the knowledge and techniques to create high-quality soaps that rival those found in specialty stores. Get ready to unleash your creativity, indulge in the sensory experience, and elevate your bathing routine with your own homemade soaps.
Supplies You’ll Need To Get Started
Equipment / Tools
- Silicone mold
- Heat-resistant container (bowl, saucepan, etc.)
- Whisk
- Gloves, goggles and mask (when using lye)
Materials
- Soap base (either purchased pre-made or ingredients from your chosen recipe)
- Essential oils

Instructions
Step 1: Prepare the Mold
- First, prepare your soap mold. Use a silicone mold which can be purchased online or at any craft or kitchen supplies store. They come in various shapes and sizes, from basic square or rectangle ones to more festive shapes such as stars or hearts. Set the mold, as well as any essential oils you’ll be adding, out so that you have everything on hand once you’re ready to pour the soap mixture.

Step 2: Melt the Soap Base
- Using the melt and pour method, begin by melting your soap base. If you are using a pre-purchased base, check the instructions on the packaging for exact melting instructions. Usually, you can either melt your base in the microwave or on the stove. If you want to use your microwave, place the soap base in a heat-resistant, microwave-safe container such as a bowl and microwave it for short segments of time, say 10 or 20 seconds at a time, until it has fully melted.
- If you prefer melting the soap base on the stove, use the double boiler method. Place the soap base in a heat-proof container such as a bowl, then fill a saucepan with water so it’s about a third of the way full. Place the heat-proof bowl inside the saucepan, and let the water come to a slow boil over low heat until the soap has melted.

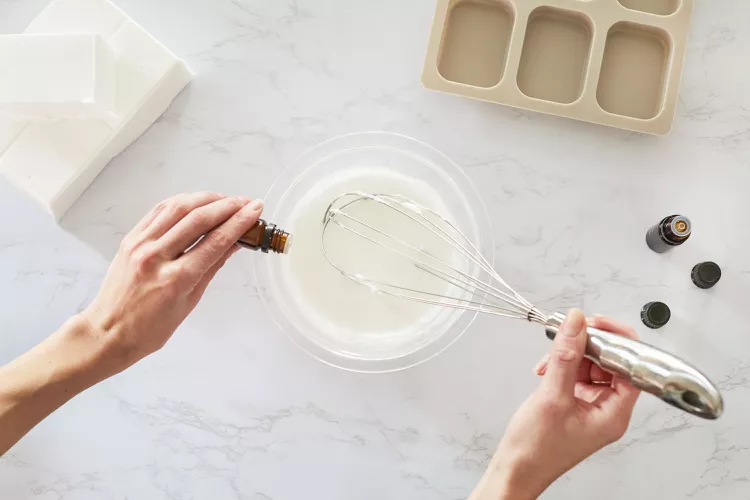
Step 3: Remove from Heat and Whisk in Oils
- Once the mixture has melted, take it off the heat. You’ll need to work pretty quickly at this point, which is why it’s important to have all your tools ready before you get started. If you are using essential oils to add a scent to your soap, now is the time to do it. Whisk the oils into the melted mixture very gently so that bubbles don’t form and it stays nice and smooth.
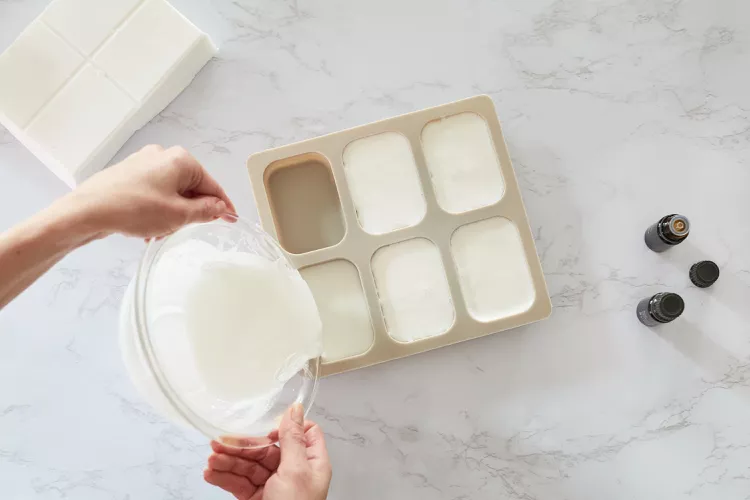
Step 4: Pour the Soap
- As soon as you’ve mixed in your fragrance, it’s time to pour the soap into the silicone mold. Fill each of the mold segments with the same amount of the mixture so you get nice and uniform soaps to give them a professional look. Fill each of the segments all the way to the top.
Step 5: Let It Set
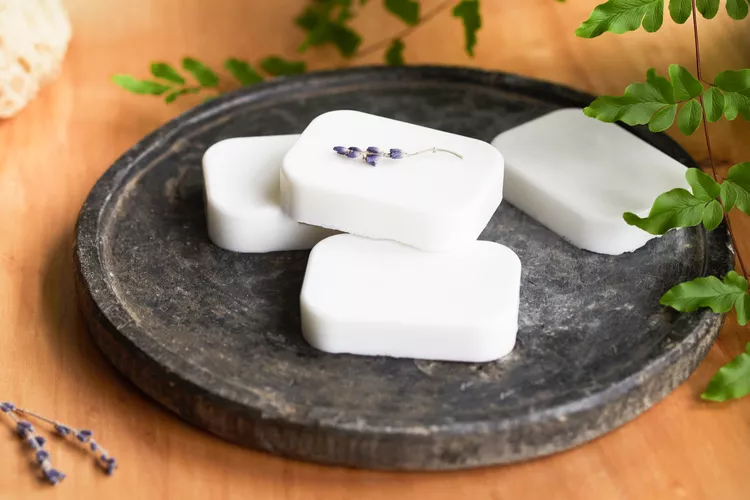
- Let the soap set and don’t move the mold until it has. This could take anywhere from a couple of hours to a full day, check your recipe or soap base packaging for exact setting times. Once it has fully set, pop each of the soaps out of the mold and they’re ready to be used or packaged to be given away as homemade gifts for friends and family.

Discover the joy of creating handmade soaps and embark on a fun-filled journey that unleashes your creativity. Try making your own soap and experience the satisfaction and excitement that comes with crafting something unique and personal.