
How To
How to Create Light Leaks in Photoshop
Jul
If you want to give your photos a vibrant and striking touch, adding a light leak effect can work wonders. The light leak or lomo effect adds a unique “punch” to your images, making them visually captivating and attention-grabbing. In this article, we will guide you through the process of creating light leaks in Adobe Photoshop. By following our instructions, you’ll learn how to add and manipulate light leak overlays, adjust blending modes, and fine-tune the effect to achieve the desired result. Whether you’re aiming for a vintage feel or simply want to experiment with creative enhancements, this tutorial will equip you with the skills to create stunning light leaks in Photoshop. Let’s dive in and unlock the potential of this effect to elevate your photo editing game!
Creating Light Leaks in Photoshop
First thing you need to do is open your image in Photoshop.
Before we start, you should know the light source of the image. (Check out our other post on everything you need to know about photography lighting.)
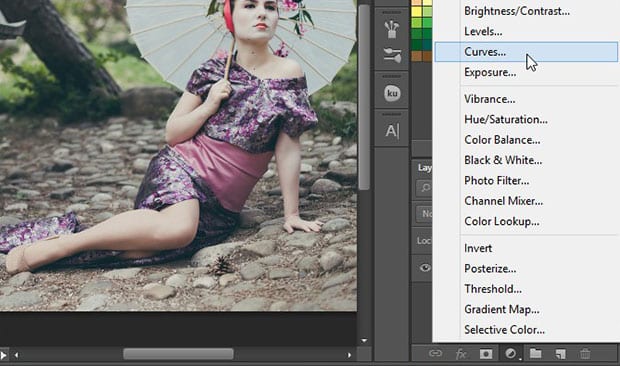
Now, click on the half-filled circle icon at the bottom right corner of your Photoshop screen to add a Curves adjustment layer.
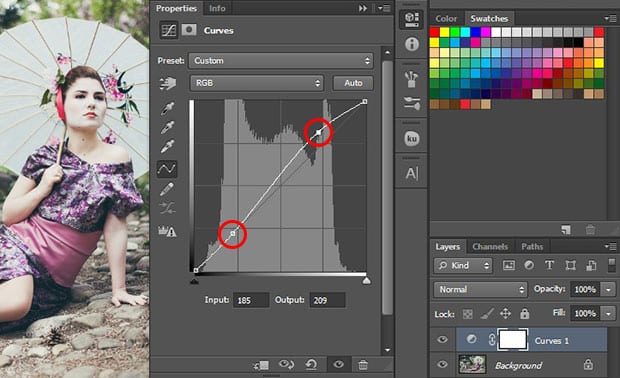
Simply lift the curve up near the top, and pin it near the bottom as shown in the image below:
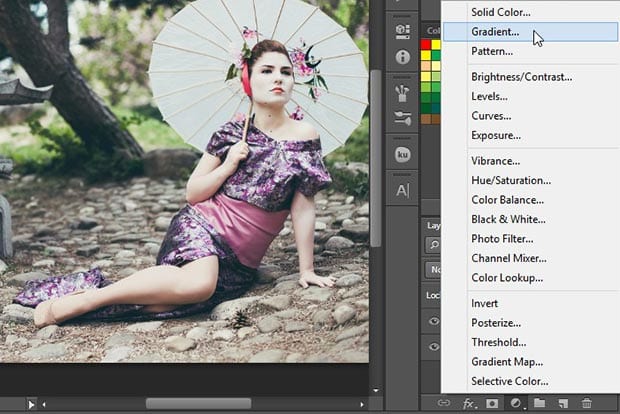
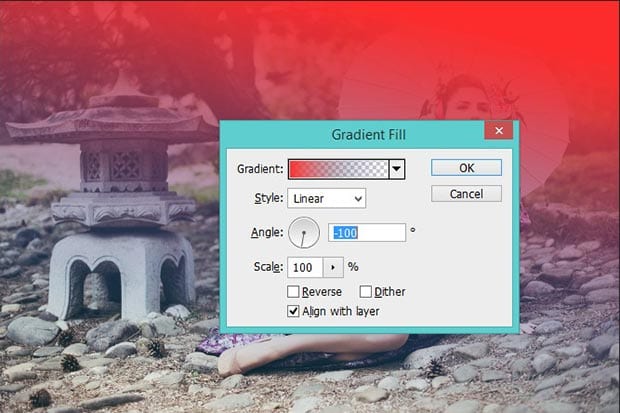
Next, click on the Adjustment layer icon again to add a Gradient adjustment layer.
Go ahead and set the gradient color to ‘fc2c2c’. You’ll need to set the Angle to -100, and leave everything else as-is.
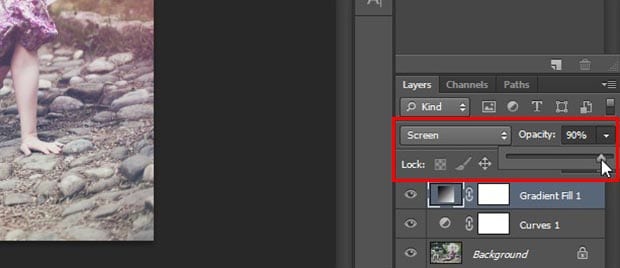
Next, change the blending mode of the Gradient adjustment layer to Screen and reduce the opacity to 90% for a beautiful light leak effect.
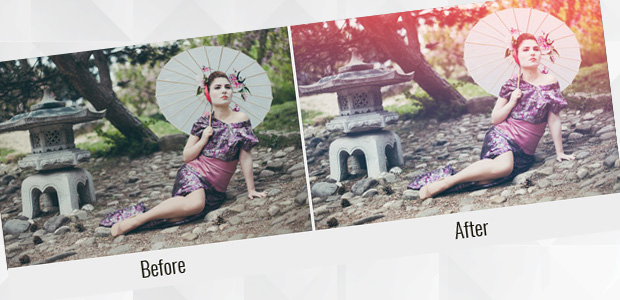
That’s all. You can see the before and after image below.