
DIY Tips
Master the Art of DIY Labels: Step-by-Step Guide to Creating Your Own
Jun
Welcome to our comprehensive guide on mastering the art of DIY labels! Are you tired of cluttered spaces and disorganized belongings? Look no further, as we have the solution for you. In this step-by-step guide, we will take you on a creative journey to create your own personalized and stylish labels. Whether you’re a seasoned crafting enthusiast or a beginner looking to add some organization to your life, this guide will equip you with the knowledge and techniques to create beautiful labels that will transform any space. Get ready to unleash your creativity and discover how DIY labels can bring a sense of order, efficiency, and aesthetic appeal to your home or workspace.
Supplies You’ll Need To Get Started
- Heavy-duty packing tape
- Scissors
- Inkjet printer
- Paper
- Craft stick or other sturdy object with a flat edg
Instructions
Step 1 – Make And Print Your Design
- Start by creating your labels and printing them out — you can make them in Microsoft Word, Google Docs, or whatever word processor you like best. (Tip: To make 4 labels per page as shown above, set your page orientation to landscape, insert a 2×2 table, and set the borders to 0 px or make them transparent). For best results, choose a bold or thick font and print your design in black or grayscale, as thin fonts and colored ink don’t usually transfer as well.
Step 2 – Tape Over The Design
- Carefully cover the printed area with a piece (or pieces) of heavy-duty packing tape.

Step 3 – Press The Ink And Cut The Labels
- Use a craft stick (or whatever you can find that’s sturdy and has a flat edge) and rub it firmly over the printed areas to ensure a solid bond between the ink and tape. Don’t be afraid to use some elbow grease here, because more pressure will make for clearer labels.
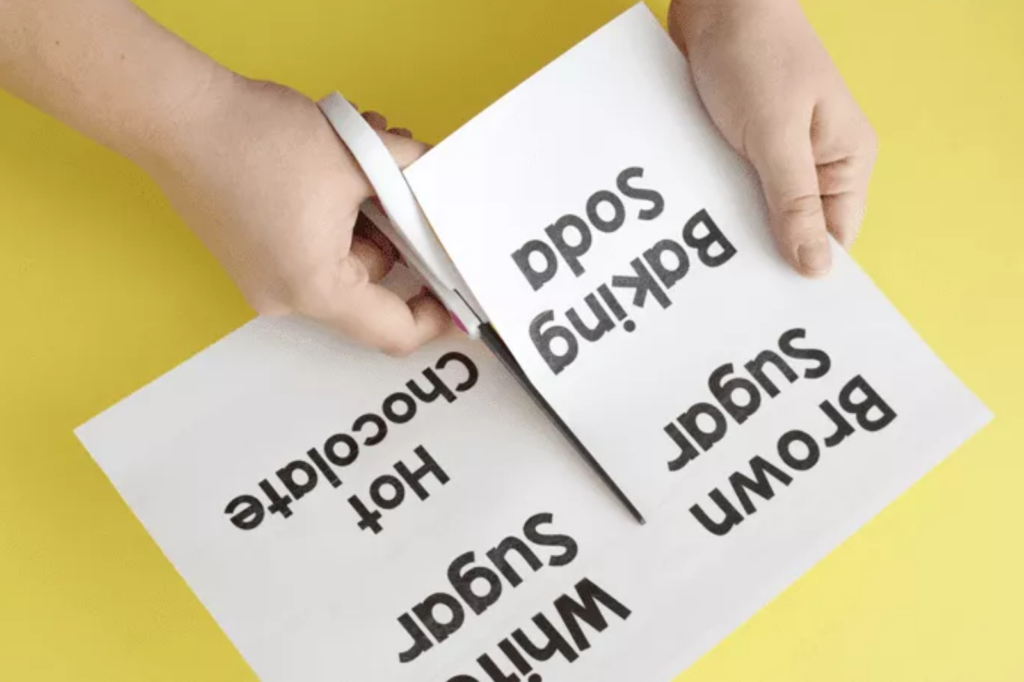
- Use scissors to cut your labels down to your desired size.
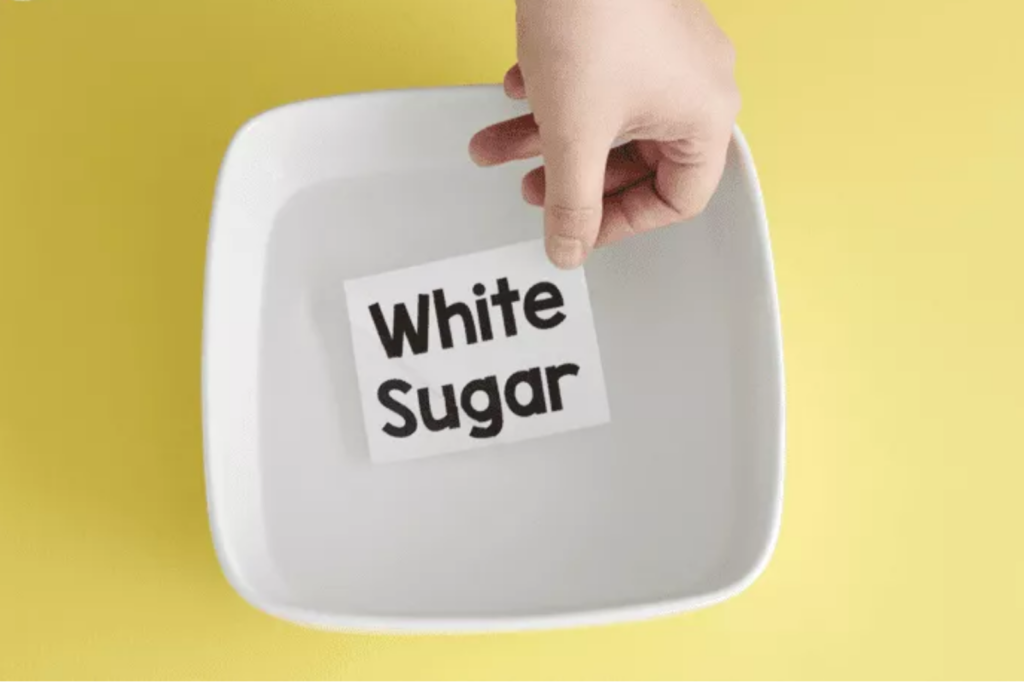
Step 4 – Soak The Labels
- Next, fill a wide, shallow bowl with warm water and put the label(s) in to soak. Leave them there for 20 minutes to an hour, or until the paper separates easily from the tape.
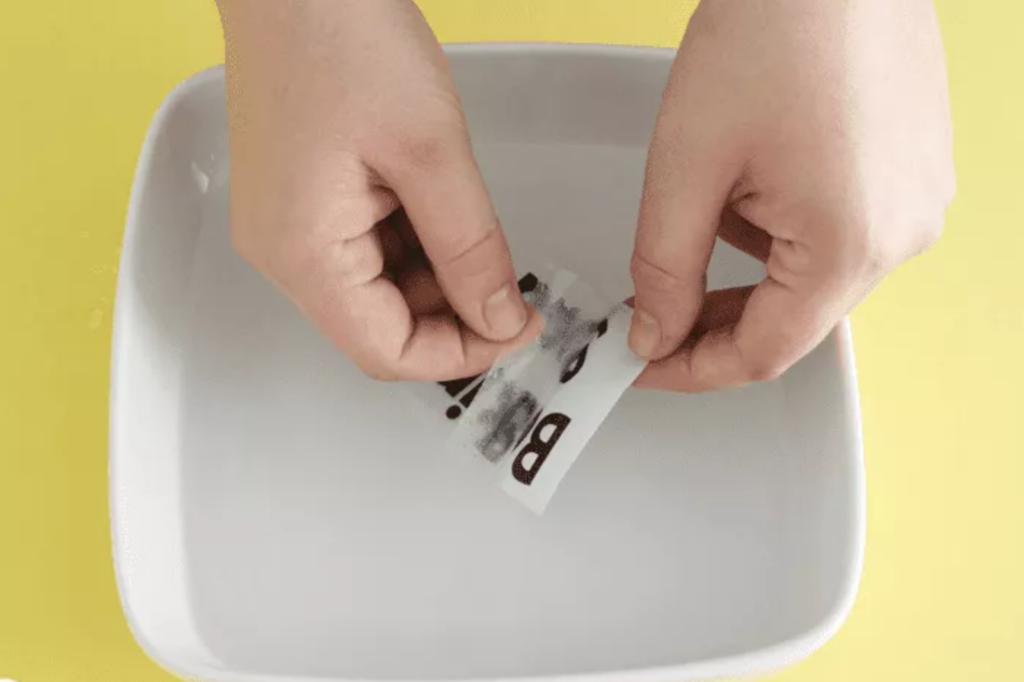
Step 5 – Remove The Paper And Let It Dry
- After soaking, remove the labels from the water and carefully peel the paper away from the tape. Set the wet labels on a towel with the sticky side facing up, and allow them to dry for a few minutes (or until the adhesive becomes sticky again).
Step 6 – Apply Your Finished Labels
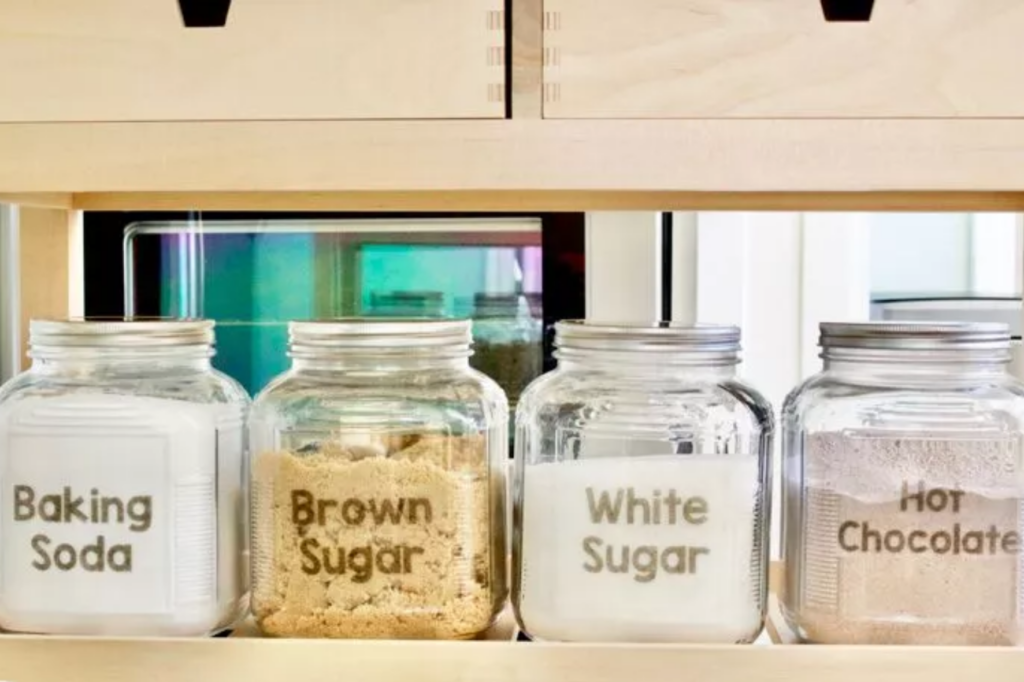
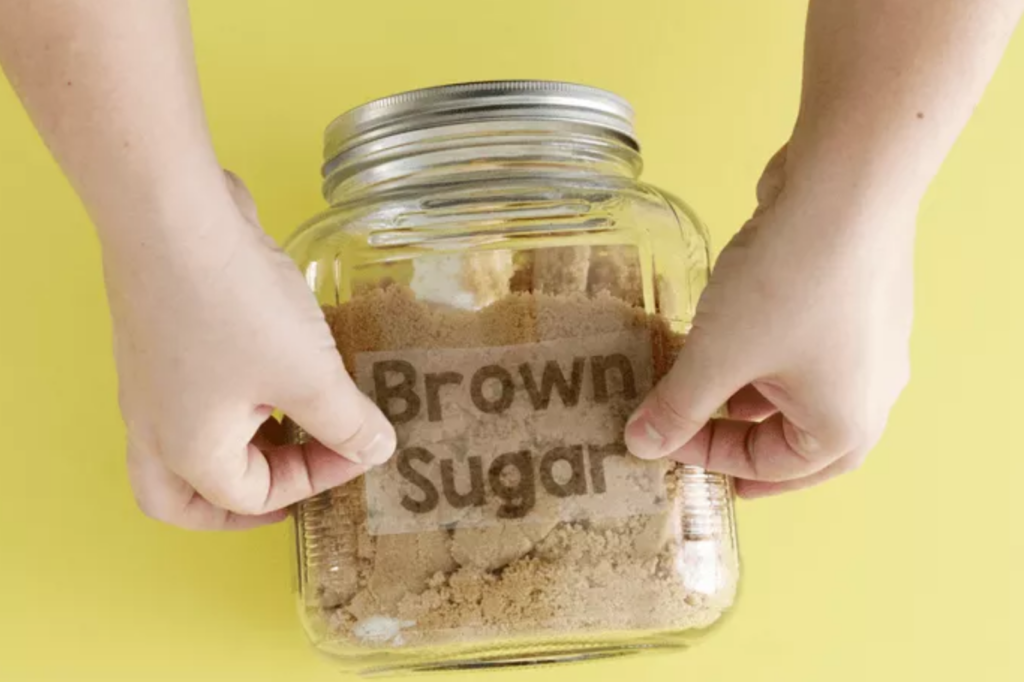
- Finally, apply your finished clear labels as desired — they look great on glass, but you can also apply them to wood or plastic.

I absolutely adore the captivating appearance of these clear labels adorning the spacious glass jars in our bustling kitchen at the OGT Studio. The seamless combination of elegance and practicality is truly a sight to behold. What’s even more remarkable is that these labels were crafted with zero expenses incurred, making it an icing on the cake! Witnessing the transformation of our kitchen organization without having to spend a dime has brought about a profound sense of satisfaction. Our DIY approach has not only elevated the aesthetic appeal of our space but has also exemplified the immense potential for resourcefulness and creativity. It’s a testament to the fact that organizing our surroundings can be both visually pleasing and budget-friendly.