
DIY Tips
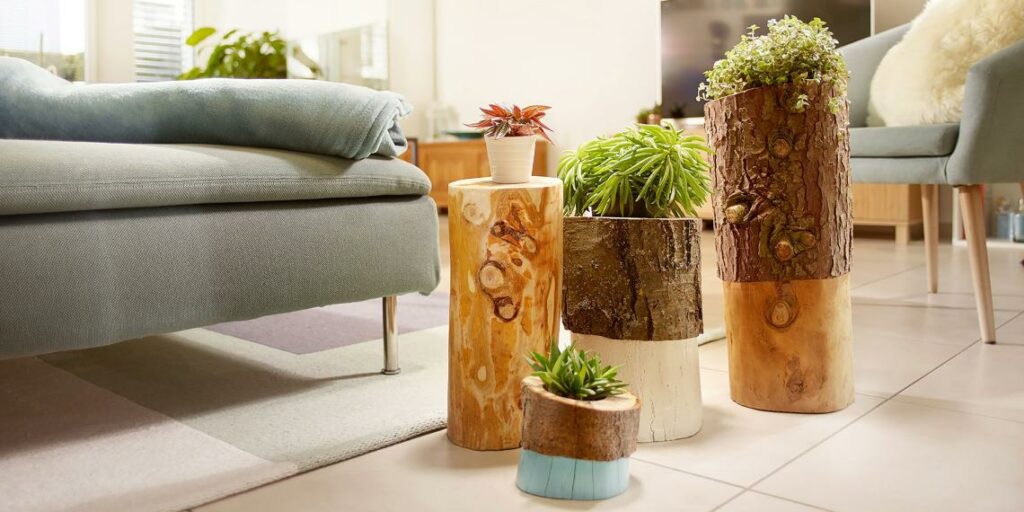
Creating Rustic Charm: DIY Flower Pots Made from Logs
May
If you’re looking for a fun and eco-friendly way to create unique planters for your garden or indoor plants, making DIY flower pots from logs is an excellent option. Not only does it allow you to repurpose old logs that may otherwise go to waste, but it also creates a charming rustic look that’s perfect for any natural or outdoor-themed décor. In this guide, we’ll walk you through the step-by-step process of how to make DIY flower pots from logs, including the materials, tools, and techniques you’ll need to create your own one-of-a-kind planters. Whether you’re an experienced DIY enthusiast or just starting, this project is an enjoyable and satisfying way to showcase your green thumb and creativity.
Supplies You’ll Need To Get Started
Tools
- Multifunction tool
- Impact drill
- Forstner bit: 50 mm
- Plunge cut saw blade for wood for the multi-function tool
- Paint spray system
- Vacuum
- Multi-sander
Utilities
- Work gloves
- Face mask
- Ear protectors
- Safety glasses
- Floor protector or cover sheets
- Tape measure
- Mortice chisel
- Mallet
Materials
- Logs of various sizes: 30–50 cm x 20–30 cm (H x D)
- Clear or matt varnish for wood
- Paint in a color of your choice
- Cling film for the inner lining
- Drainage material, such as expanded clay
( L: Length, W: Width, H: Height, D: Diameter)
Instructions
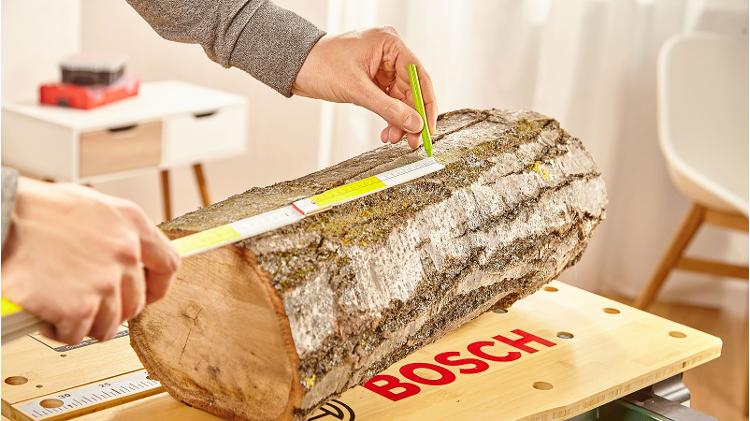
Step 1: Mark out the dimensions for the DIY plant pots
It’s easiest to get your logs cut by a carpenter or a timber merchant in your area. Or if you’re going to buy your logs at a hardware store, you should also be able to get your wood cut there. It’s best to choose logs with different lengths for more variety. Alternatively, you can cut them yourself using a chain saw. If you want to use wood from a tree that has only been felled recently, leave it indoors for a few days to let it dry out sufficiently. Otherwise signs of mould may start to appear on the surface of your DIY plant pot.
( You need: pencil, tape measure, logs)
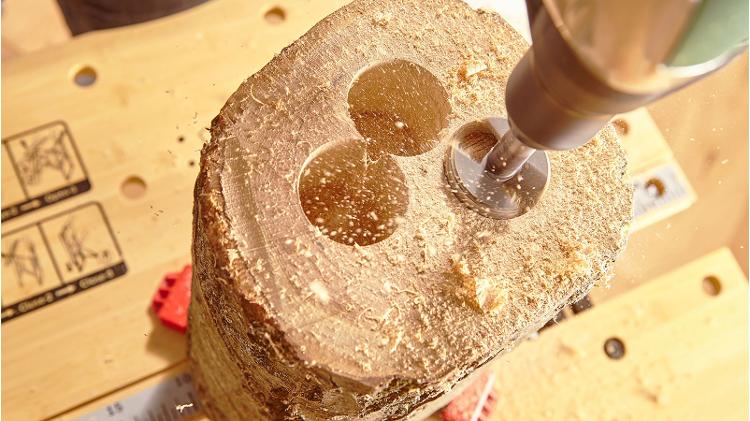
Step 2: Hollow out the log to make an opening for the flower tub
To make a DIY flower pot out of the log, hollow out roughly half of it. The easiest way to do this is to use a large Forstner bit to bore several holes in the log, then hollow out the bits in between to create one big hole. To do this, place the mortice chisel against the wood and tap the end with the mallet to chip away at the inside of the log. You can remove the wood shavings afterwards using a cordless vacuum cleaner.
( You Need: impact drill, Forstner bit: 50 mm, Vacuum, mortice chisel, mallet, safety glasses)
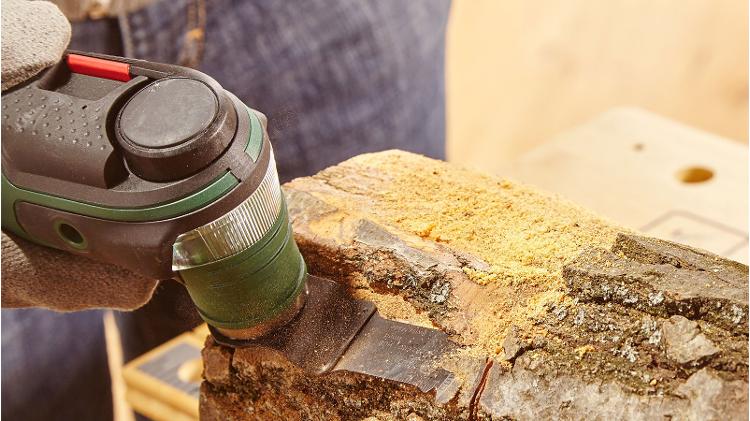
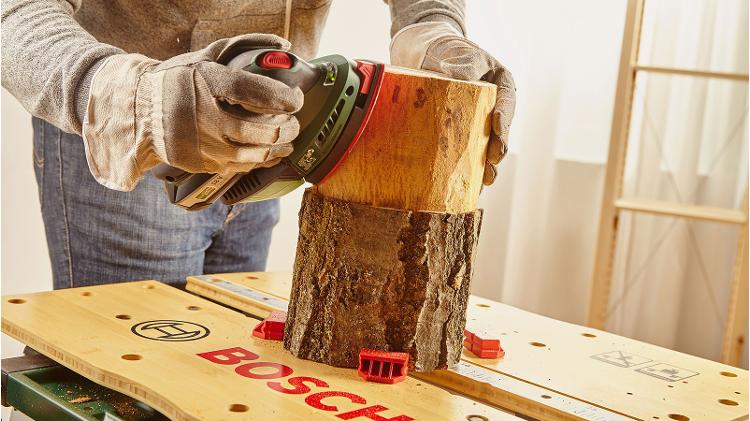
Step 3: Remove the bark at the bottom of the log
Now the hollowed-out log is starting to look more like a DIY flower pot. Make the outside of the log look nicer by using a multi-function tool and a suitable saw or scraper attachment to remove the bark from the bottom part. When doing so, secure the log against a workbench to ensure that it doesn’t slip.
( You need: Multifunction tool, Plunge cut saw blade for wood for the multi-function tool, work gloves, safety glasses )
Step 4: Sand down the bottom part of the log
Once you’ve removed the bark, sand down the wood thoroughly using a multi-sander and 120-grit sanding paper. This will help you get rid of the last bits of bark and remove any splinters.
( You need: Multi-sander, Sanding sheet for multi-sander G120, work gloves )
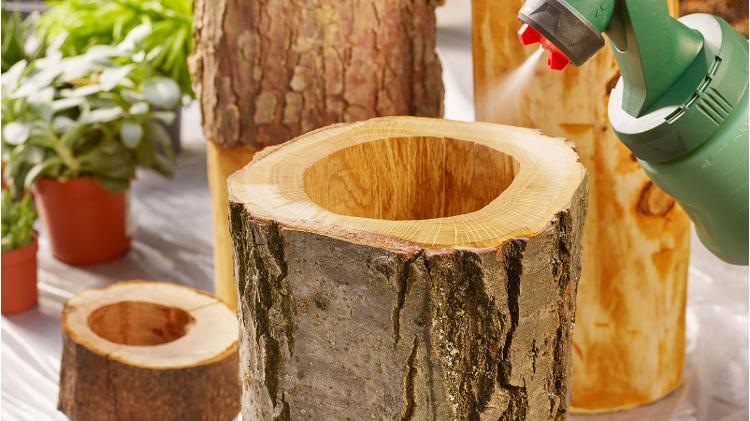
Step 5: Varnish your DIY plant pots
- Now it’s time for the final step. Coat your flower pots in clear or matt varnish to protect the wood. To add a dash of color, you can also paint the area where you have removed the bark.
- It’s best to lay a protective sheet on the ground and tape over the parts of the log which you don’t want to paint or varnish beforehand. Once you’ve put on your safety gear, fill the paint spray system with varnish or paint and apply an even coat to the log.
- Let it dry thoroughly and then line the inside of the flower pot before adding the first plants. To protect the wood from getting damp, it’s best to use cling film or pond liner. And to avoid a build-up of damp in your DIY plant pot after watering, you should add a drainage layer such as expanded clay, which is especially well-suited for indoor plants.
( You need: paint spray system, face mask, disposable gloves, clear or matt varnish, paint in the color of your choice, protective paper or film )
We hope this guide has been helpful and inspired you to try this unique and eco-friendly project. Thank you for taking the time to read our article!