
DIY Tips
How to Make a Stunning DIY Resin Phone Case
Jun
Embark on a creative adventure and learn how to craft a stunning DIY resin phone case that will truly make your device stand out. In this comprehensive guide, we will take you through each step of the process, unlocking the secrets to creating a personalized and eye-catching accessory. From selecting the perfect colors and embellishments to mastering the art of resin pouring and curing, you’ll gain the skills and confidence needed to design a phone case that reflects your unique style. Get ready to unleash your inner artist and transform your phone into a captivating work of art with our expert tips and techniques for creating a stunning DIY resin phone case.
Supplies You’ll Need To Get Started
- Promise Epoxy Table Top (4 – 8 oz, depending on the size of your case)
- Star and moon glitter
- Graduated mixing cups
- Stir sticks
- Multiple colors of glitter
- Nitrile gloves
- Safety glasses
- Clear phone case
- Dried flowers and plants
- Stickers of your choice (we had butterflies to fit the nature theme)
- Tweezers
Instructions
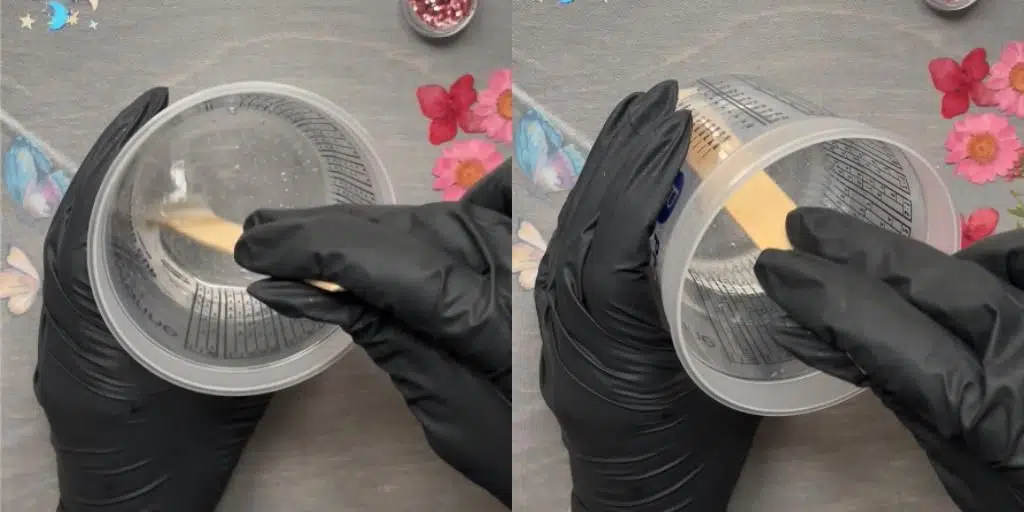
Step 1: Prepare and Combine Your Epoxy Resin
- Safety first! Before you start working with epoxy resin, make sure that you’re wearing protective eyewear and gloves, cover your workspace or use a silicone mat in case of spills, and be sure to work in a well-ventilated area.
- Measure and pour equal amounts ProMarine Table Top Epoxy Resin by volume. If you need help calculating the amount of resin required to cover your phone case, you can use an epoxy calculator.
- Slowly and thoroughly combine the two parts of the epoxy resin until there are no swirls and minimal bubbles. Scrape the sides as you go to ensure that all the resin is incorporated. Slowly stir and fold for 3–5 minutes.
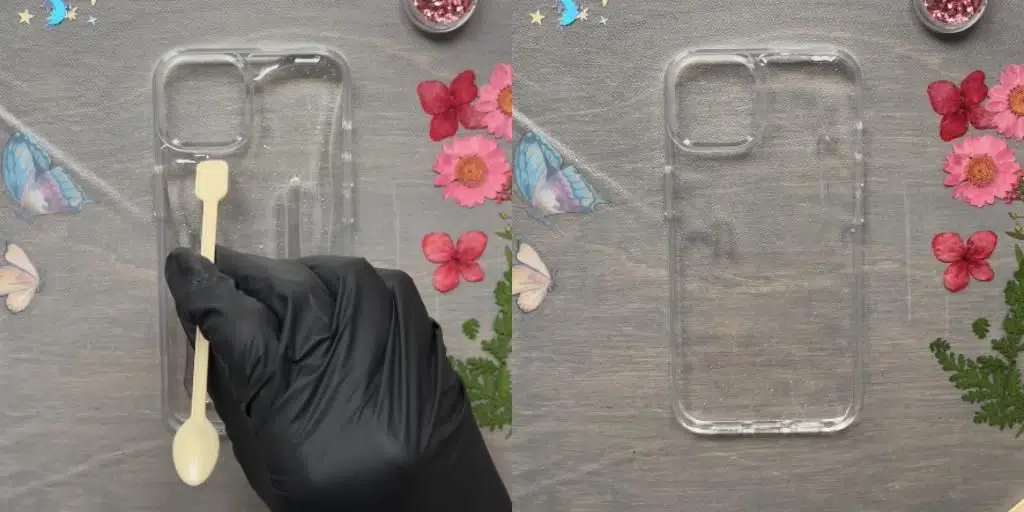
Step 2: Pour and Distribute the Resin
- Set up your clear phone case with the back facing you. This is where you’ll be pouring your layers of clear resin. Pour the prepared resin in a thin stream along the edges of your case and then into the center. Leave a little behind to add later.
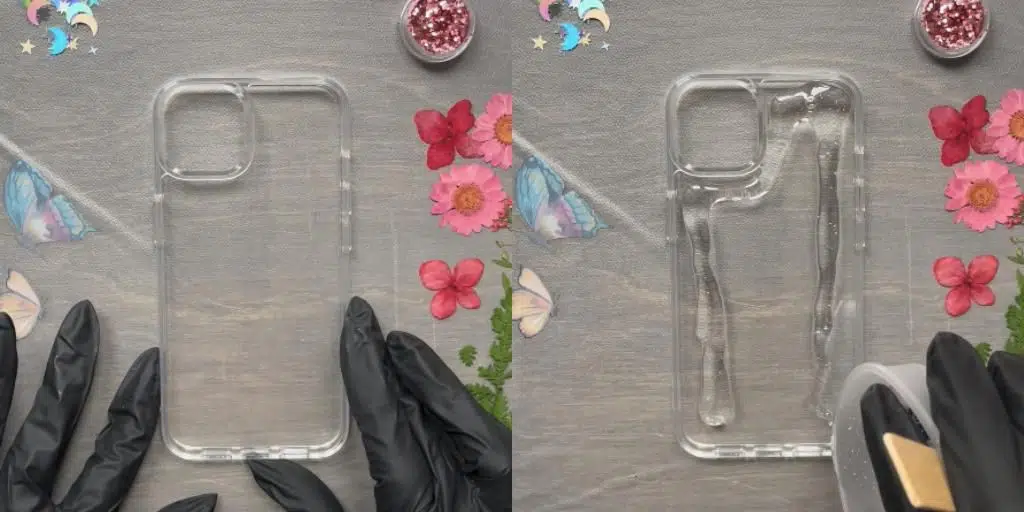
- Although ProMarine Table Top epoxy is self-leveling, it helps to have a tool of some kind to evenly coat the case. Whatever you choose, the utensil should help you level the resin before you add your decorations. Also be sure that the surface where the phone case will cure is level.
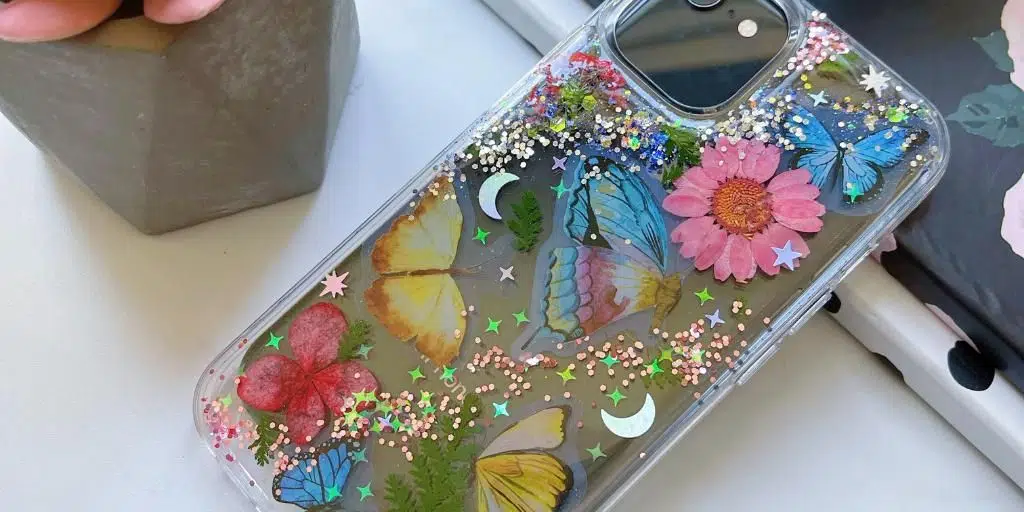
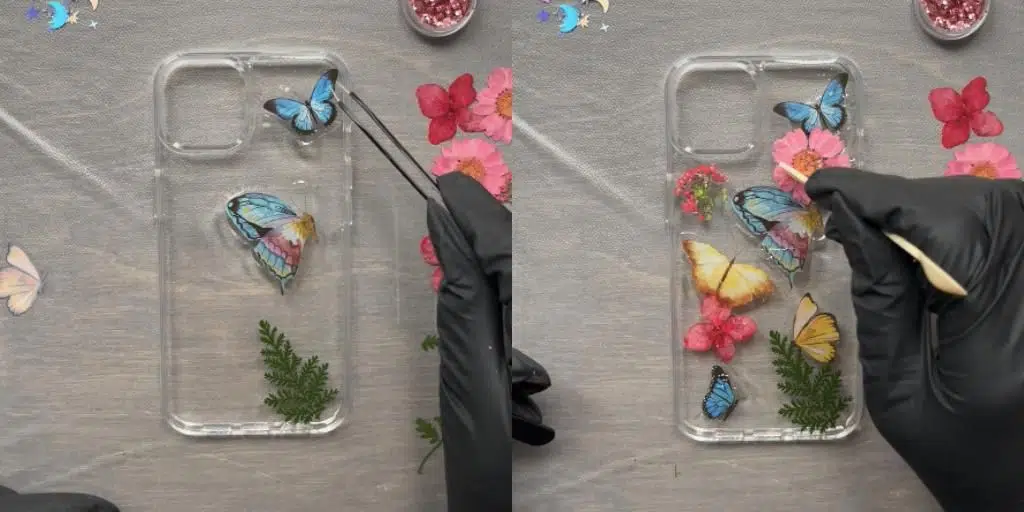
Step 3: Decorate Your DIY Phone Case and Layer with Resin
- Take your tweezers and use them to apply several of your stickers to the resin. Gently pat down your decorations as you place them so that the resin can help hold them in place. Eventually, you’ll coat all the decorations with another layer of resin. This process of encapsulation is a frequently used technique in the resin crafting community.
- If you decide to use flowers like we did, you can purchase fake or real ones. If you get real flowers, it’s best to go through the process of drying them before encapsulating them in resin. Although it takes extra time, drying these items out is crucial to limiting bubbles, since it removes the inherent moisture in flowers. Arrange the flowers to fit your style.
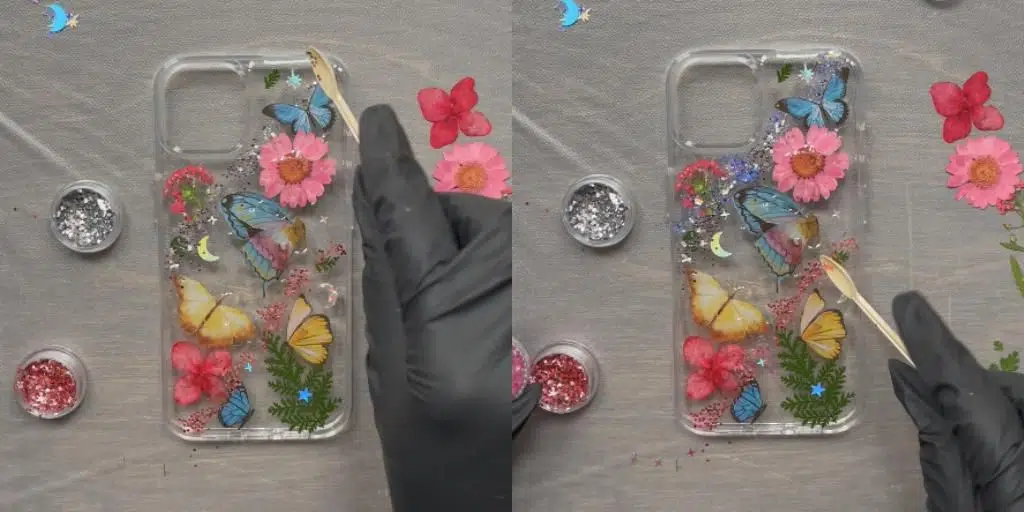
- You can use a popsicle stick to drizzle some resin onto what you’ve added and incorporate some star and moon glitter. The resin eventually provides your cell phone décor with a clear protective layer when cured. Don’t be afraid to move your inclusions around a bit while the resin remains uncured to help align your design with the way you envision it.
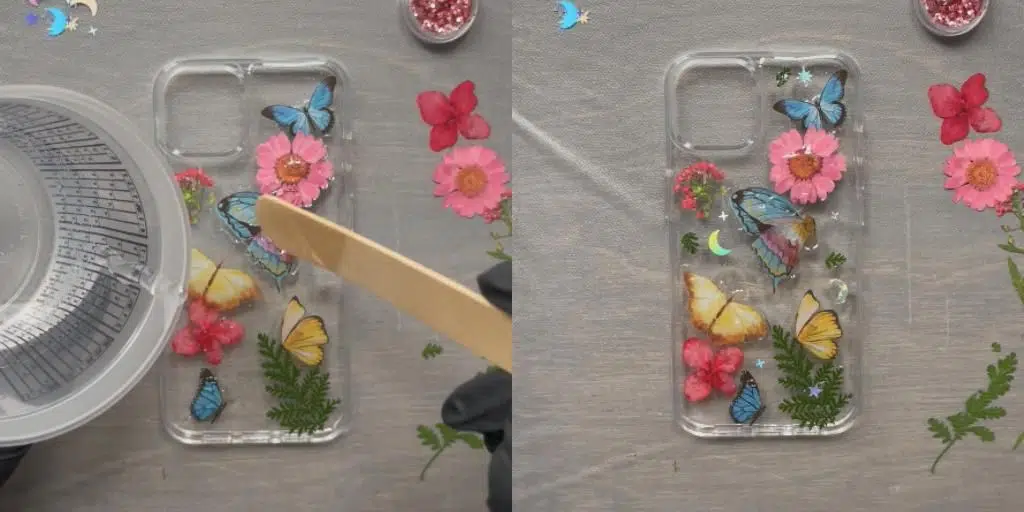
- Continue to intermix your décor. Style it whatever way you want! We combined flowers, butterfly stickers, and small pieces of glitter to achieve our look.
- For this design, we chose to sprinkle different colors of glitter diagonally across the design we created. We started with silver on the top and dark pink toward the bottom …and eventually layered dark blue and lighter pink on top of those.
Step 4: Add Your Final Coat of Resin and Enjoy!
Once you’re satisfied with how everything looks, it’s time for the resin to cure! It’s best to let it sit where it won’t accumulate any dust or come into contact with debris. Allow it to cure in an environment with a temperature of around 75–80 degrees Fahrenheit for 72 hours.
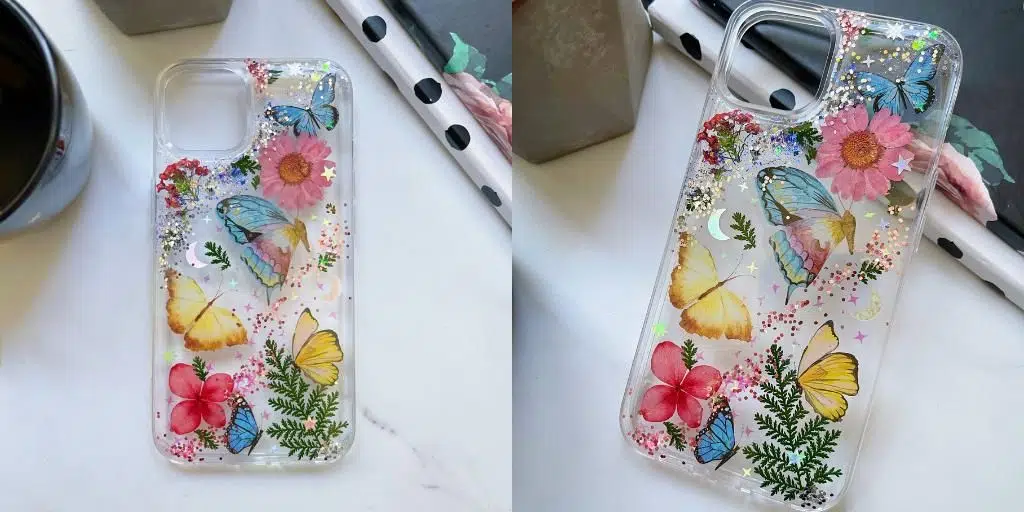
With your DIY resin phone case complete, you’ve not only crafted a personalized and eye-catching accessory but also discovered the joy of creating something truly unique. Embrace your creativity and continue exploring the world of DIY projects, where the possibilities are endless. Happy crafting!