
DIY Tips
Sticker Crafting Made Easy: A Step-by-Step Guide to Creating Stunning Stickers with Cricut

Jun
Welcome to the world of sticker crafting with Cricut! If you’re looking to add a personal touch to your belongings or express your creativity through custom stickers, you’re in the right place. In this comprehensive guide, we will walk you through the step-by-step process of creating stunning stickers using your Cricut machine. From designing unique graphics to cutting and applying the stickers, we’ll cover everything you need to know to make your creations come to life. Get ready to dive into the world of sticker crafting and unlock endless possibilities with Cricut!
Supplies You’ll Need To Get Started
- A cutting machine. For this tutorial, I’ll be using a Cricut Maker.
- Design software. I’ll be using Cricut Design Space, but your software of choice will work, too as long as it has a Print Then Cut feature.
- An inkjet printer. For the custom stickers we’re making today, you’ll need to use printable vinyl and a color inkjet printer. (If you only have black & white, you’ll have to make black and white stickers, like that dinosaur up there.) This is my favorite.
- Printable vinyl or sticker paper. I’ll be using Expressions Vinyl Inkjet Printable Vinyl in this tutorial. It comes in 8.5″x11″ sheets to easily fit in a regular desktop inkjet printer. You can also use Cricut Sticker paper available here.
- Clear vinyl laminate. (optional) Regular printable vinyl is rated to last one year (outdoors) without a laminate. With a clear laminate, that outdoor durability extends to 4 or 5 years! I recommend a precut sticker sheet of Oraguard 210 Economy Vinyl Laminate, so you don’t have to buy a whole roll.
- Application tool. This is a hard, straight edge for helping burnish vinyl, sealing it into place. A plastic scraper, or something like an old credit card, will work.
Instructions
Step 1: Prepare and print your design
- I’ll be using a Cricut Maker and Design Space, but the process will be the same for other machines. We’ll be making own our custom stickers in this tutorial so that we can label some jam. Open up a new design in Cricut Design Space.
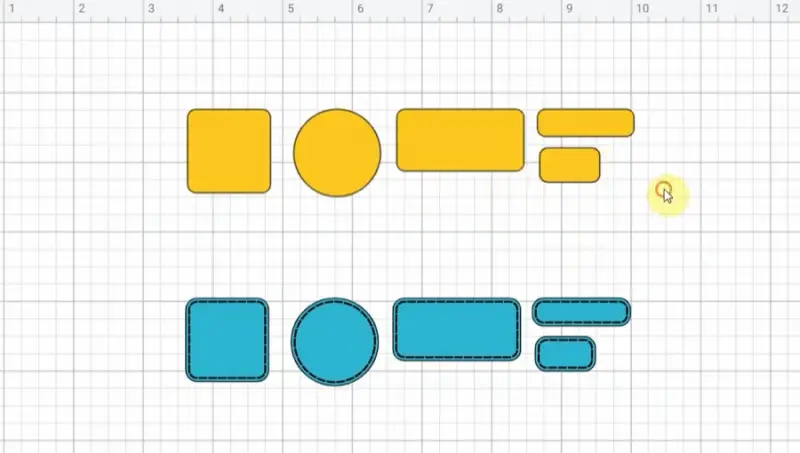
- Go to Design Space and choose ‘New Project,’ and then add a shape. Start simple. Choose a circle. Once your circle is in place, click on it to select it. You can leave the shape black, or change the color. (I have a template of different shapes I import into a new project like this.)
- The next step is to change the size. Do this by typing your desired dimensions into the size area.
- Now that we have our size, we need to add words to our design. Click on the text icon on the left and type out the word for your first label.
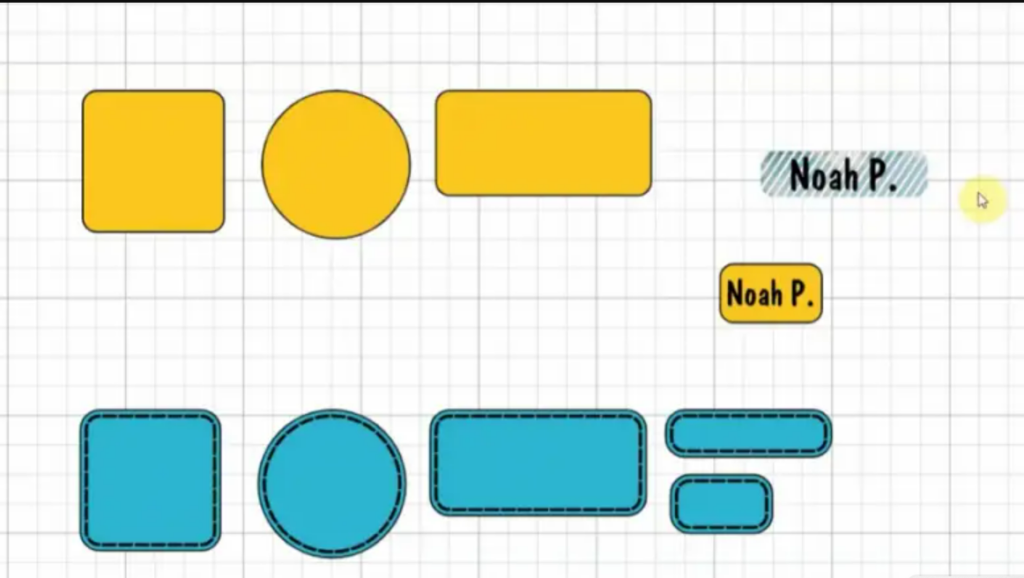
- Your word will probably come out far too large. To resize the text click on the resize button on the bottom right of your text area and drag the text to a smaller size and position it where you’d like in the circle.
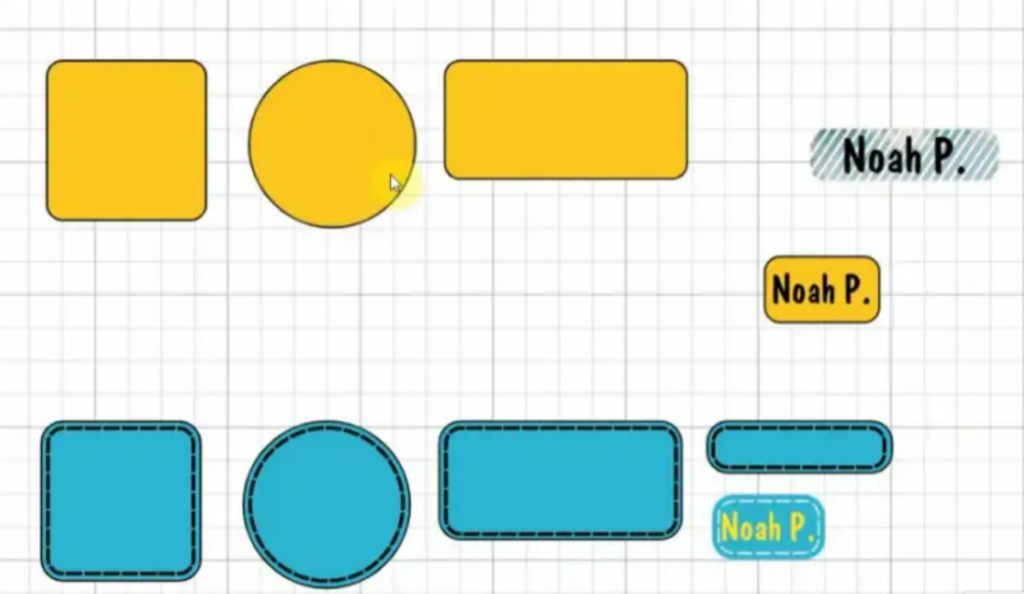
- Repeat this step for the number of different labels you want to try out. Be sure to line up all labels within a printable area so they don’t overlap each other.
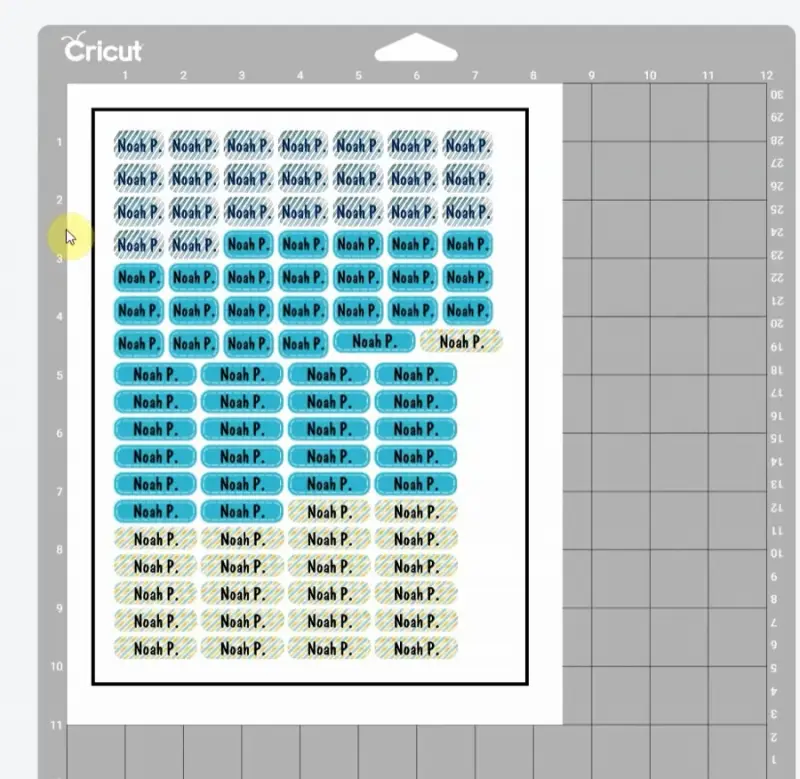
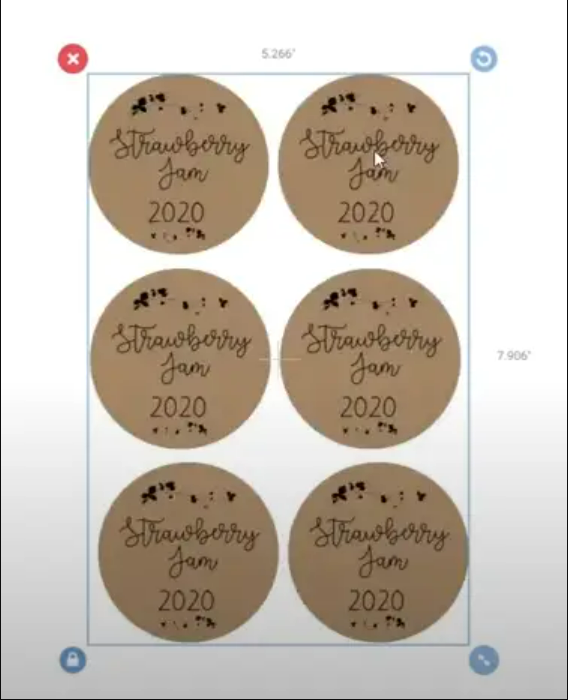
- With all projects, you need to know Cricut’s printable area, which is 6.75″ x 9.25″. When working with multiple designs, it’s important to line up all your labels, vinyl decals, cleaning labels, or other designs within these dimensions. But don’t worry, Cricut’s got it covered after you create your project:
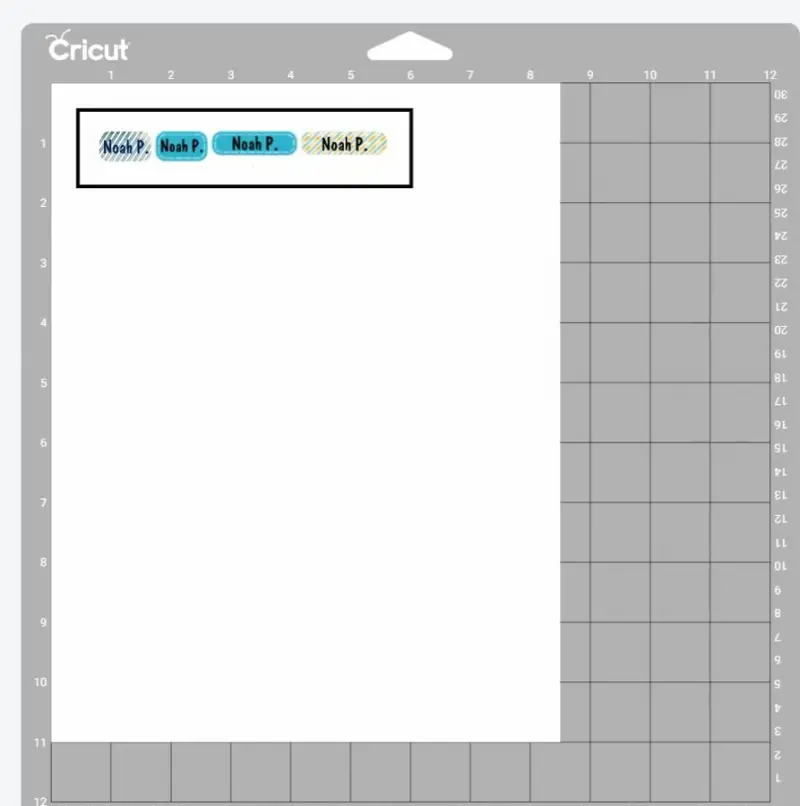
- Just play with the number of copies on the left until they fill your project area:
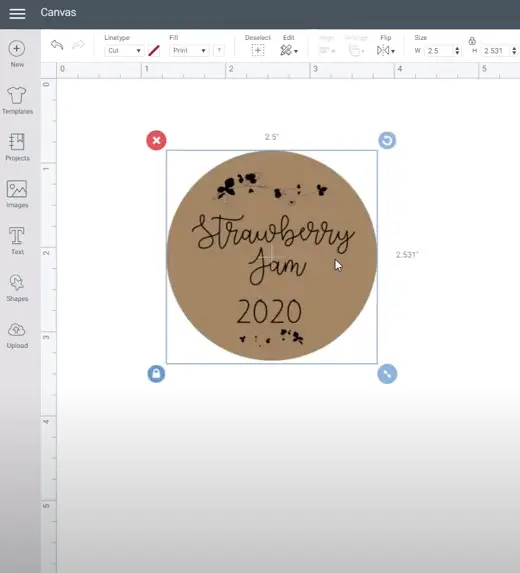
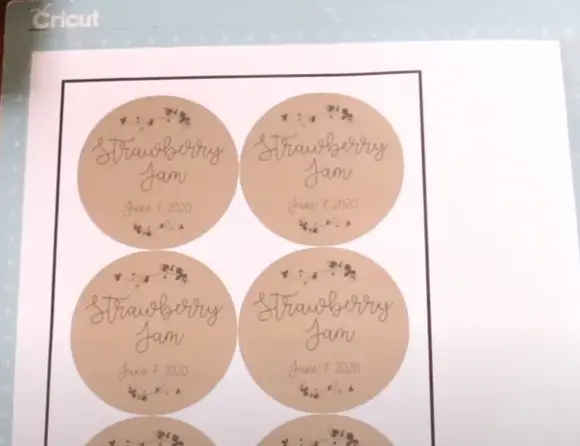
- Alternatively, you could also upload an image and add it to your label, like Christy Cain does with this strawberry design below.
- To do this, click on the upload button on the left-hand menu and browse until you find an image you like. After the image is uploaded, you’ll need to shrink the image the same way we did with the words.
- We’re almost finished! Our next step is to select all our labels and then click the button on the bottom right that says ‘Flatten’. This makes sure you’re cutting out the label as one solid piece, as opposed to cutting out the letters or the image as well.
- Click the green ‘Make it’ button on the top right.
Step 2: Send to the printer
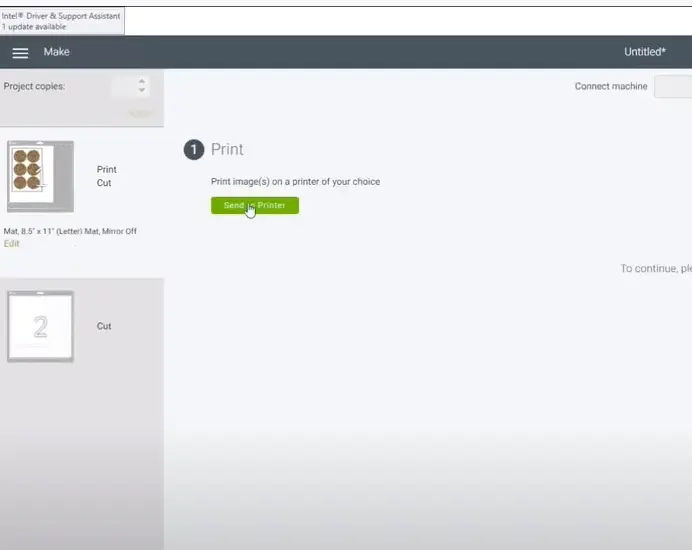
- After you click the ‘Make it’ button, you’ll be taken to the print screen. Click the green ‘Send to Printer’ button.
- Pause here for a moment to load the printable vinyl into your printer. Print on the matte side of the vinyl, not the glossy side. For many printers, the correct way to load the printable vinyl would be liner side down but always double-check your machine.
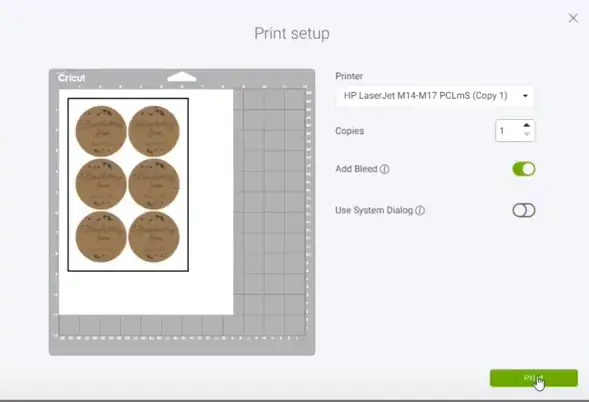
- Once the vinyl is loaded properly, go back to the screen. Make sure ‘Bleed’ is on, and then click on the print button.
Step 3: Apply vinyl laminate (optional)
The top printable layer of this vinyl is a little more delicate than regular vinyl. On its own, the stickers will last for about a year and won’t be very water-resistant. But if you protect them with a clear laminate, then they can last for up to 5 years and withstand being washed.
- Once your design is printed, place it on a hard, flat surface.
- Starting from one edge, begin to peel the backing off of your clear vinyl laminate. Only peel off an inch or so to start.
- Line up the edge of the laminate with the edge of your paper, and press it down smoothly so there are no creases or air bubbles.
- Using a ruler or scraper, smooth the laminate onto the printed page as you pull the paper backing away.
- Use that same tool so burnish the laminate onto the printed vinyl. This helps the laminate stay in place and helps get rid of any air bubbles.
Step 4: Place it on the mat
- Congratulations! You’ve printed your beautiful vinyl labels and they should be looking great! All we have left to do is cut them out.
- Place the printable vinyl sticker sheet on your cutting mat and align the top left corner. Smooth it down. Make sure to position your printable vinyl design on the mat the same way your design appears on the Design Space screen.
Step 5: Cut the labels
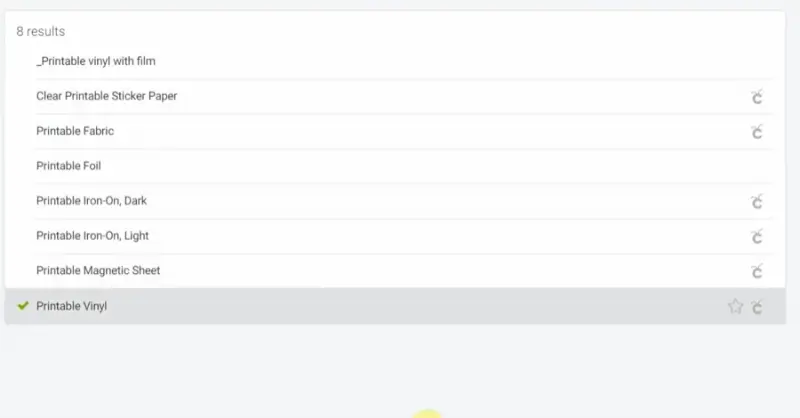
- Back at the Cricut Design Space screen, choose ‘Browse all Material’, type in printable vinyl and select it. Some machines might have a manual dial on the Cricut machine where you can select the material.
- Load the mat with the printed vinyl into the Cricut. Double-check you have the fine point blade equipped in your machine.

- Back at the Design Space screen, choose ‘Fast Mode.’
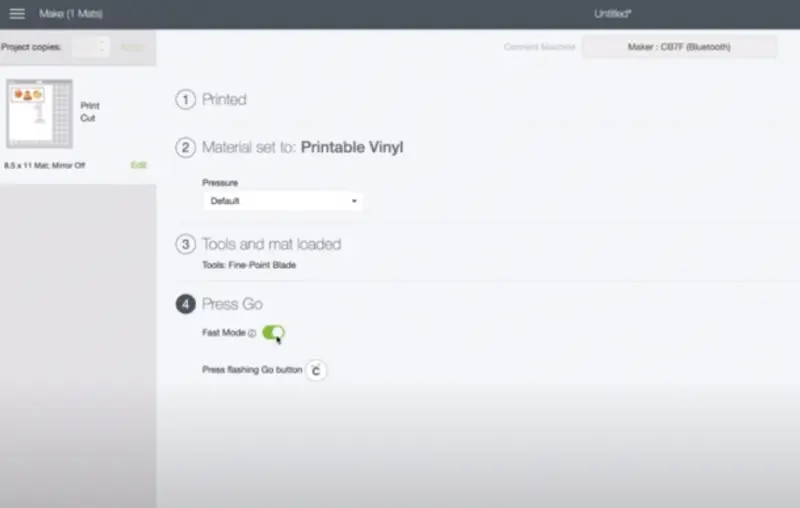
- Click the flashing Cricut button on your machine.
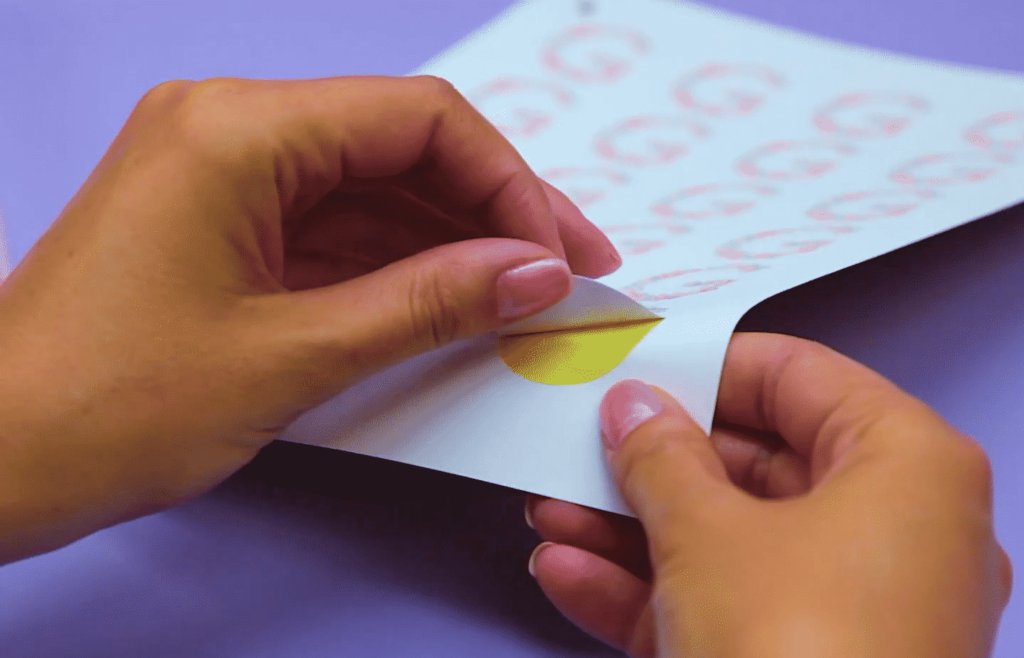
Step 6: Peel ’em and place ’em
When finished, click ‘unload’ and remove the mat, along with your printable vinyl labels. Peel the printable vinyl labels off the backing with your fingers, or use a Cricut weeding tool, or a pair of tweezers.
- Peel ’em off.
- Stick ’em on.
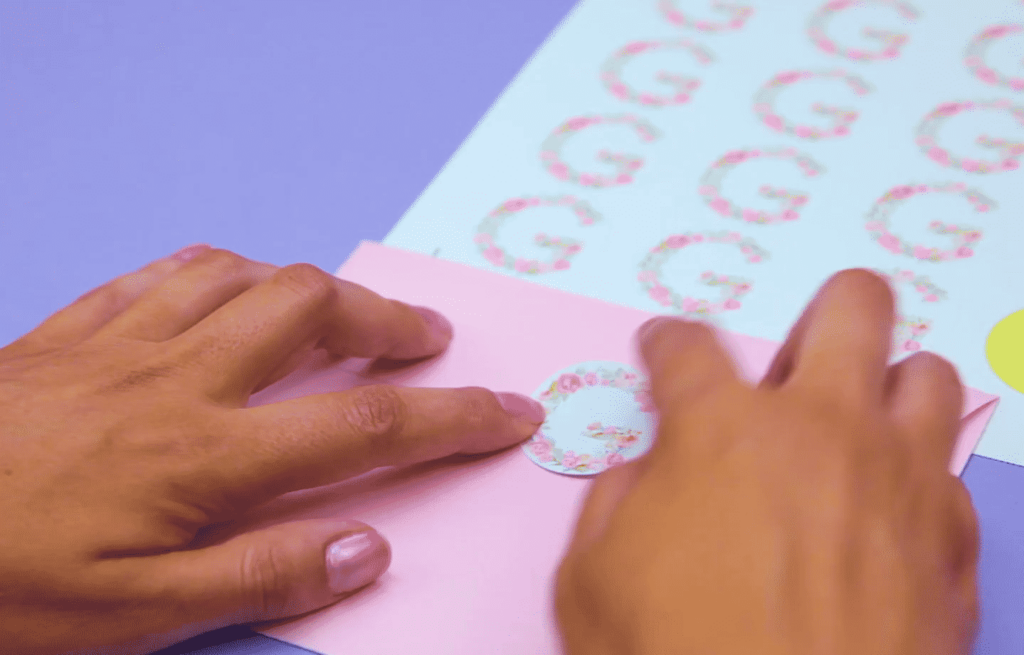
- Smooth ’em out. For long-lasting results, use your application tool to burnish the sticker in place and smooth out any air bubbles or wrinkles.
Step 7: Apply!
- Apply your labels to the object of your choice. Smooth out the printable vinyl if needed to remove any tiny wrinkles.
- The more familiar you become with your machine, the more you’ll discover what you can do. Changing the font, separating letters, squishing letters together, and adding unusual shapes are all possible.
- Play around. Find things that work for you, and definitely try out different fonts. One of my favorite things about crafting is how personal it can be!
Tips, tricks, and advice
- Don’t remove the backing paper. If you’re gifting a set of DIY vinyl decals, or a homemade vinyl sticker book, leave the project on the backing paper.
- Be careful with your ink. Allow the ink to completely dry on inkjet printable vinyl before working with it.
- Avoid using a laser printer. Some printable vinyl is compatible with a laser printer, but the heat generated from its operation will often melt the vinyl or activate the adhesive backing too early. I really recommend starting with an inkjet printer, or using printable vinyl that’s specifically designed for laserjet use.
- If you notice your ink running when you place the laminate or acrylic spray, let the page dry for up to a day to let the ink fully set. Some types of ink take longer to set.
- If your printer keeps jamming, you’ll want to use a printer that can handle heavier-weight paper. These printers will have a “straight path” instead of a “U-shaped path” so the paper doesn’t need to be bent.