
How To
How to Create a Beautiful BW Portrait in Photoshop
Jul
If you’re interested in transforming your color portraits into striking black and white images, you’re in luck! The black and white effect can add a timeless and captivating aesthetic to many photographs. In this article, we will guide you through the process of creating a beautiful black and white portrait using Adobe Photoshop. You’ll learn various techniques to achieve the desired effect, including adjusting tones, enhancing contrast, and fine-tuning the details. Whether you want to evoke a classic feel or emphasize the emotional impact of your portrait, this tutorial will provide you with the necessary steps to create stunning black and white portraits in Photoshop. Let’s get started and bring out the true beauty of your photographs in black and white!
How To Create a Beautiful BW Portrait in Photoshop
First thing you need to do is open your portrait in Photoshop.
You need to click on the half filled circle icon at the bottom right-hand side of your Photoshop screen to add a Black & White adjustment layer.
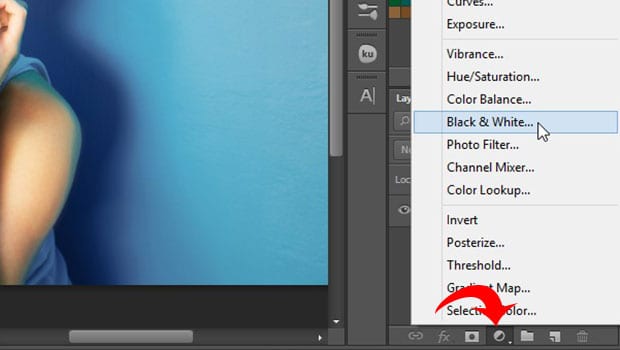
A window will pop up with the Black & White adjustment layer settings. You will notice that the portrait is already turned black and white, but it still needs a few adjustments for a great result.
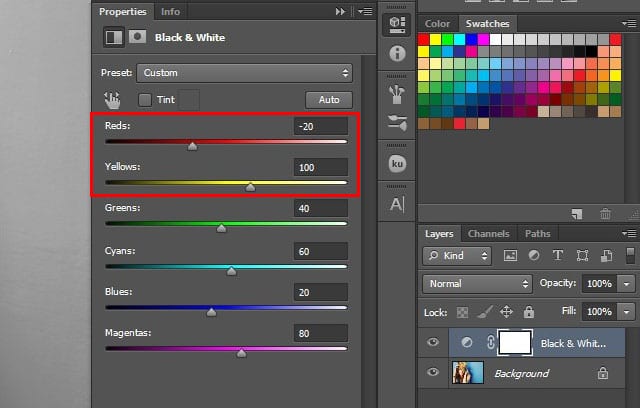
You should set the Reds slider to -20 and the Yellows slider to 100. This will help the skin of the subject to look great with the B&W effect.
Next, go ahead and click on the Tint check box. It will add a slight color to the image.
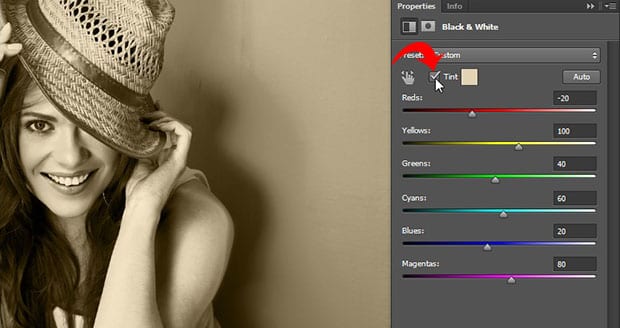
However, you can change and adjust the Tint color as you need. Simply click on the box next to Tint to open up the color picker.
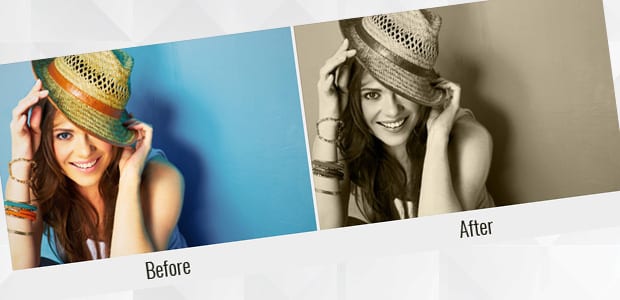
We chose a color that adds a warm sepia tone to the black and white effect, so the portrait looks warm and inviting.

Once you are satisfied with the color of the Tint, make sure to hit the OK button.
That’s all. You can see the before and after image below.