
How To
How to Create a Typography Portrait in Photoshop
Jul
If you’re eager to transform your photos into captivating works of art using typography, you’re in for a treat! Typography portraits can turn ordinary images into stunning and visually striking pieces. In this article, we will guide you through the process of creating a typography portrait using Adobe Photoshop. You’ll learn how to blend typography elements with your photo, manipulate text layers, and utilize various techniques to achieve a harmonious and impactful composition. Whether you want to make a statement, convey a message, or simply explore the creative possibilities of typography, this tutorial will provide you with the necessary steps to create stunning typography portraits in Photoshop. Let’s dive in and unleash your artistic potential by combining the power of imagery and typography!
Creating a Typography Portrait
First thing you need to do is open your portrait in Photoshop.
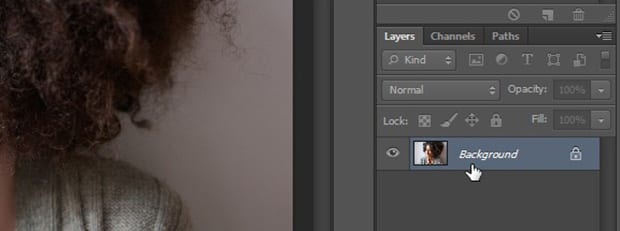
Next, unlock the Background layer from the Layers panel at the right-hand side of your Photoshop screen.
To unlock the Background layer, simply double click on the layer and press OK.
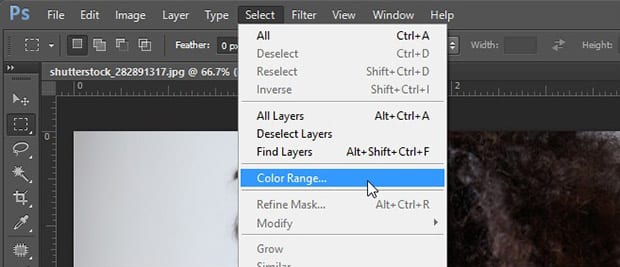
In the next step, you’ll need to add a few color ranges to your image. Go to Select » Color Range.
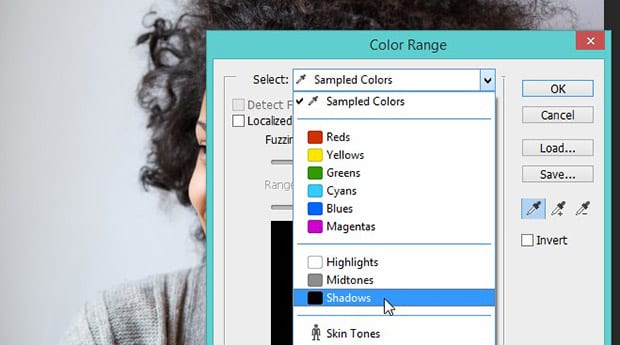
A box will popup for Color Range (this is our first color range). In the Select dropdown, you need to select Shadows and press OK.
You will see some of the shadow areas are selected. Simply press Ctrl + C to copy the selection, and then press Ctrl + J to duplicate the selection.
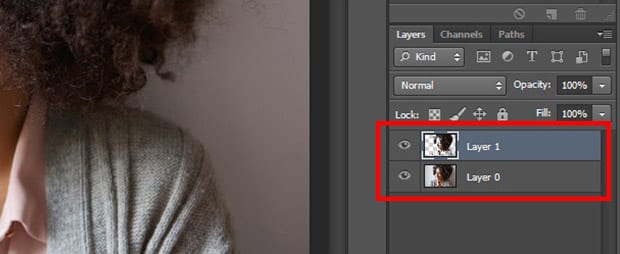
It will add a new layer in the Layers panel with the selected area of your image (named Layer 1).
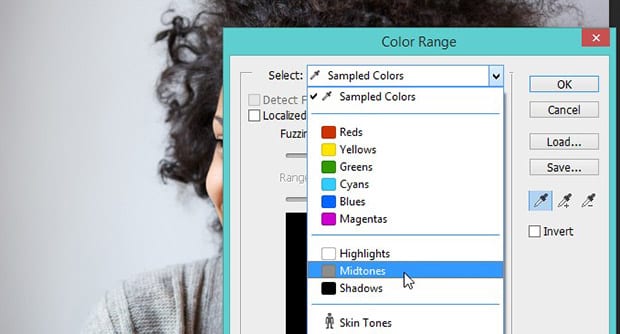
Now, select the main layer again from the Layers panel, and go to Select » Color Range. This time, you should choose the Midtones from the dropdown menu.
Again, you’ll need to press Ctrl + C to copy the selection, and then press Ctrl + J to duplicate the selection.
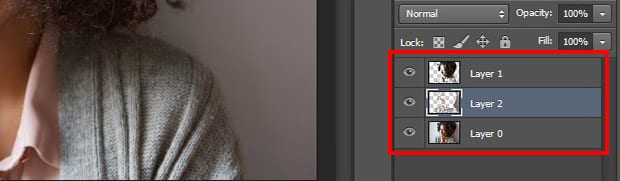
You will see a new layer added in the Layers panel with the selected area from the previous step (named Layer 2).
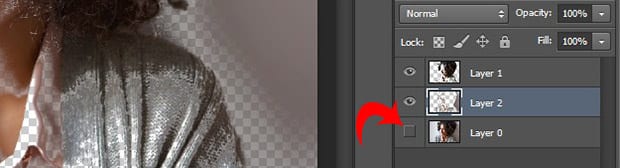
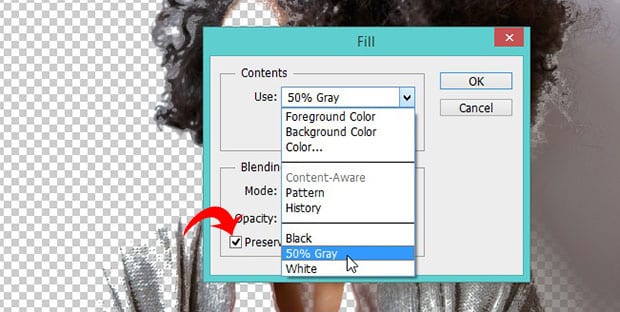
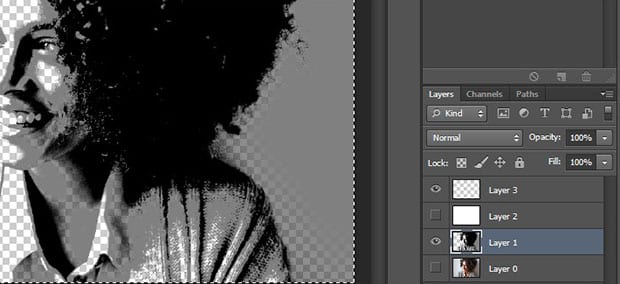
After adding the layers for Color Range, you’ll need to hide Layer 0 (click on the eye icon) and select Layer 2.
Then, go to Edit » Fill, and select 50% Gray from the Use dropdown. Check mark Preserved Transparency and hit the OK button.
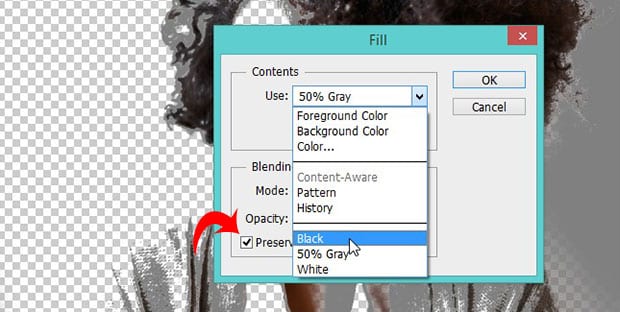
Next, you need to select Layer 1 from the Layers panel.
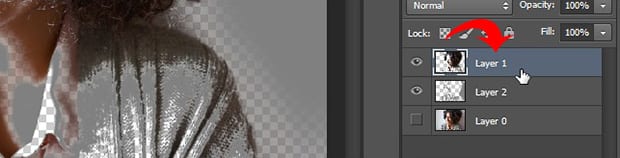
Then go to Edit » Fill, and select Black from the Use dropdown. Check mark Preserved Transparency and hit the OK button.
After that, go to the Layers panel to select Layer 1 and Layer 2 at once. Then simply right-click on the two selected layers and choose Merge Layers (they will be merged together as Layer 1).

Now your portrait is ready to add some text to it.
Add a new file in Photoshop from File » New.
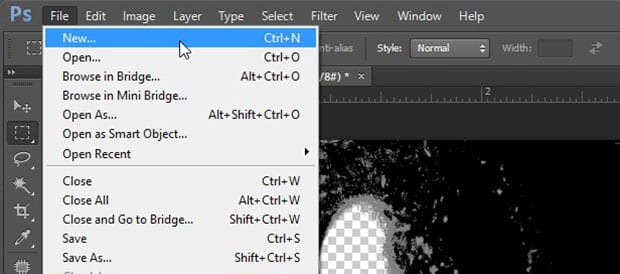
You’ll need to make the size of this new file close to the same size as the portrait file.
Under the Background Contents, select White.

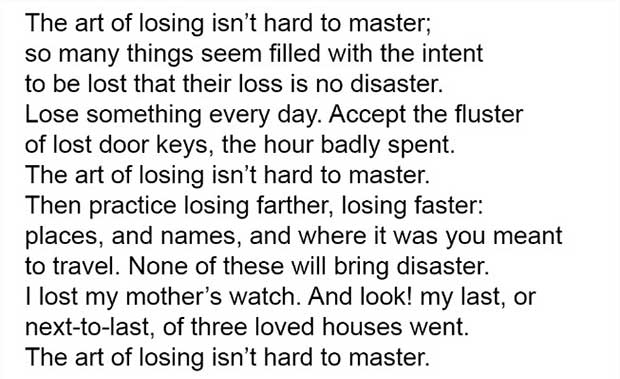
Choose the Horizontal Type Tool from the toolbar at the left-hand side of your Photoshop screen. Then, click on the file to add your content (we added the poem ‘One Art’ by Elizabeth Bishop).
We kept the following settings for text:
Font: Arial
Font Style: Regular
Font-size: 40 pt
Color: Black
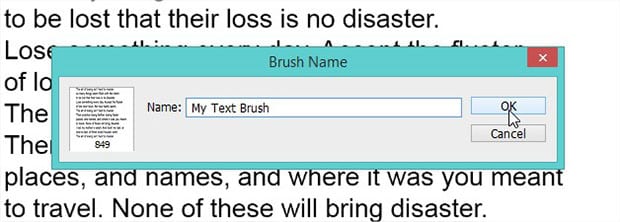
Next, go to Edit » Define Brush Preset to convert your text image into a Photoshop brush.
Add a name for your brush and press OK (we named ours, My Text Brush).
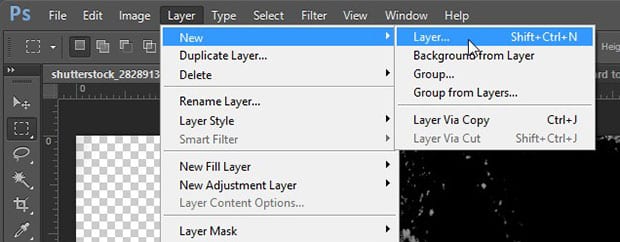
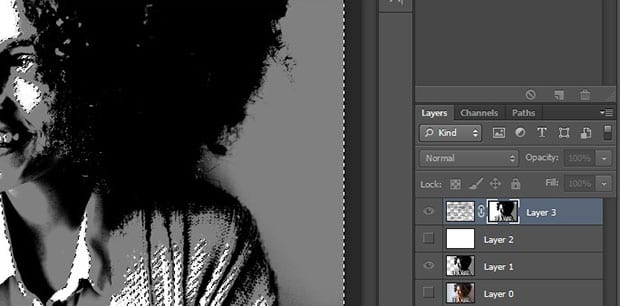
Now go back to your original portrait file. You’ll need to add two new layers…
Go to Layer » New » Layer two times to add two transparent layers (they will appear as Layer 2 and Layer 3).
Go ahead and fill Layer 2 with white using the Paint Bucket tool, and then hide the visibility (click the eye icon).
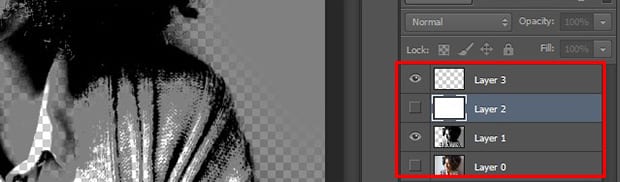
Your Layers panel should now look similar to this:
You’ll need to select Layer 1 and press Ctrl + A to select all. Then press Ctrl + C to copy the selection (we’re going to use it in the next steps).
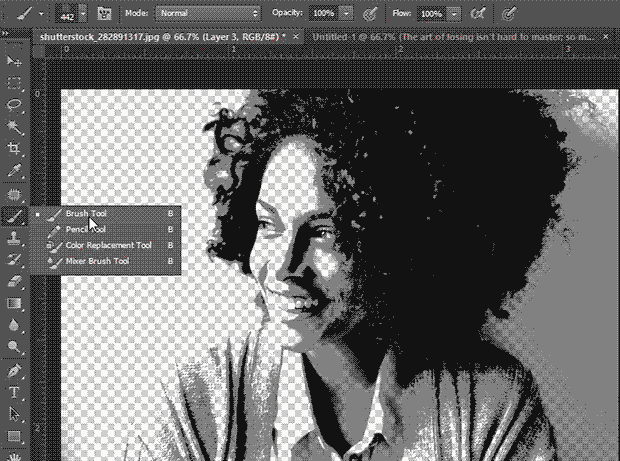
Now, select Layer 3, and grab the Paint Brush tool from the toolbar. Go to the brush settings under the top menu, and select the My Text Brush.
You may need to change the size of the brush a few times as you brush the text in your portrait… this will give it a more random effect.
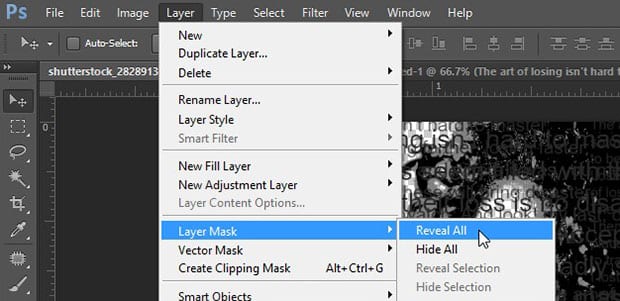
After adding the text, go to Layer » Layer Mask » Reveal All to add a masking layer to Layer 3.
Press Alt + Click on the mask layer to use it.
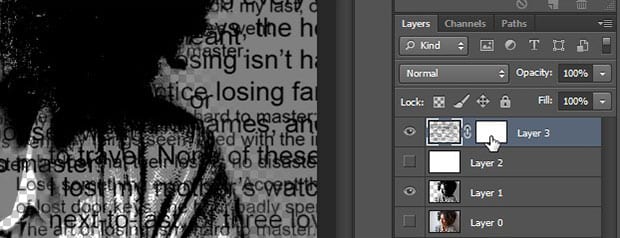
Next, go ahead and press Ctrl + V to paste the selection from the previous steps.
Then press Ctrl + D to deselect the selection and Ctrl + I to inverse the colors.
Now, click on the thumbnail for Layer 3 to make the layer active. You’ll need to hide the visibility of Layer 1 and make Layer 2 visible.
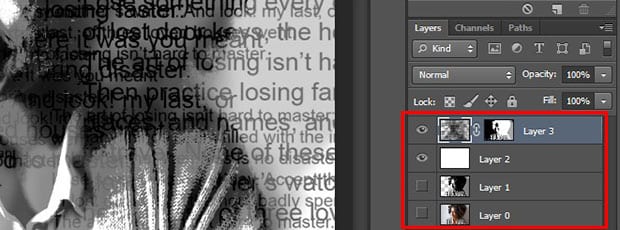
This will do two things. Firstly, it will remove the black effect from the image, so the text will be more visible. Secondly, it will brighten the image because Layer 2 is filled with white.
Then, right-click on Layer 3 and select Blending Options.
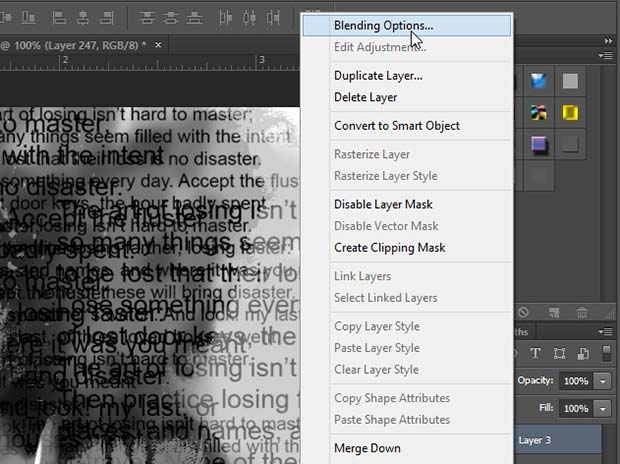
Go ahead to Gradient Overlay. In the Gradient dropdown, select the blue, red and yellow gradient (or other colors of your choice) to create a stunning, colorful effect.

Lastly, select the Brush Tool and set the foreground color to black. Select Layer 3 and brush over the hair, eyes and body, so they become visible.
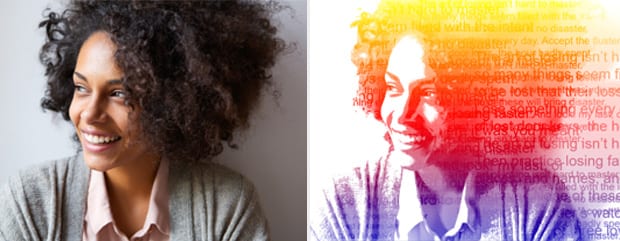
That’s all. You can see the before and after image below.