
How To
How to make vinyl stickers with Cricut

Jul
Easily create personalized vinyl stickers using Cricut. This tutorial will guide you through the process of designing and crafting your own custom stickers. With Cricut’s cutting-edge technology, you can bring your creative ideas to life. From designing in Cricut Design Space to cutting and applying the vinyl, you’ll have everything you need to make unique stickers. Express yourself and add a touch of personalization to your belongings with custom vinyl stickers made with Cricut.
Make vinyl stickers
Step 1
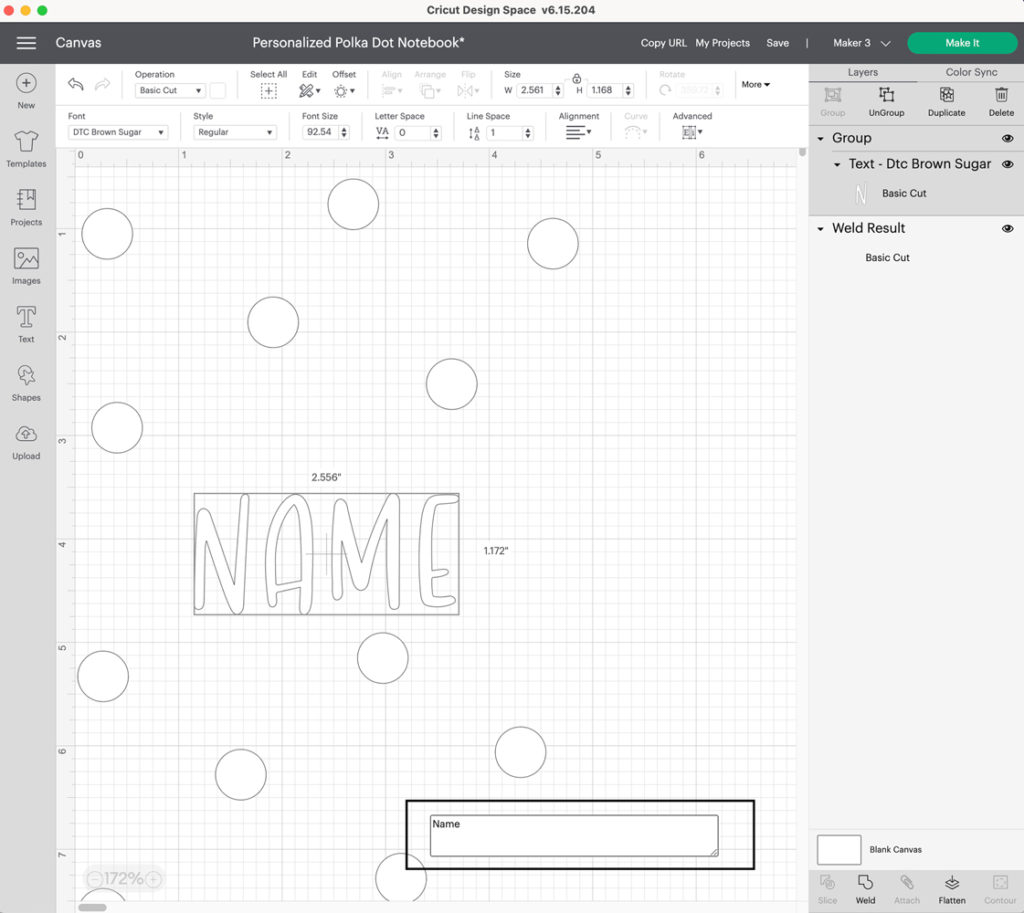
Click on the text box that says “name.” Another box should open. Click into that field and type your name. Center the text back on the polka dot design. If your notebook or journal isn’t 5” x 7” use the resize arrow on the bottom right of the images to adjust!
Step 2
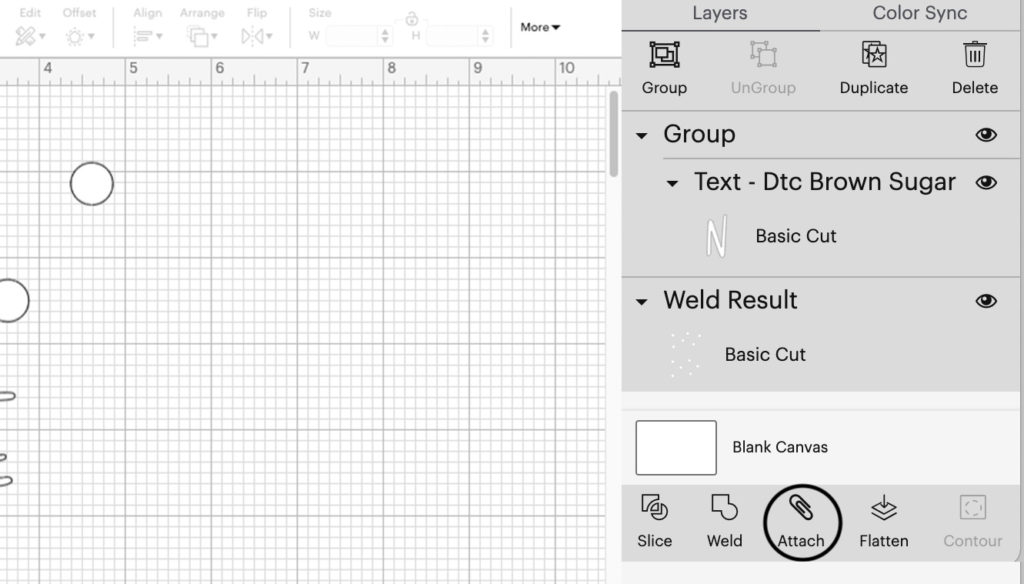
Once your design is ready to cut, select everything and click “attach,” this will indicate to the machine that you want everything to cut exactly as it looks on the canvas.
Step 3
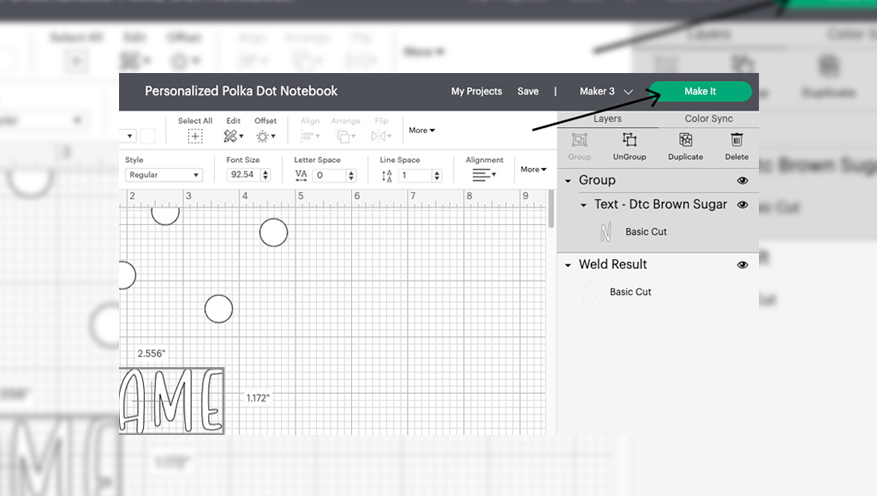
Click “Make it” in the upper right corner and follow the prompts on the software and machine through the cutting process.
Once done cutting, the machine will indicate that it’s time to unload the vinyl and weed the design. Weeding is simply a term used to describe removing excess vinyl from around the sticker’s design.
Step 4
Apply transfer tape to the front of your design and apply to your notebook! Review this article on how-to apply transfer tape or go back to the video linked above to show you how-to apply vinyl stickers.
Personalize everything with vinyl stickers
And that’s it! Now you know how to make vinyl stickers at home with Cricut! We hope you personalize all the things. Share your creations with us using #cricut.