How To
How to Use Silhouette Files in Cricut Design Space

Jul
Absolutely! It’s exciting to know that you can use Silhouette files in Cricut Design Space. In this quick and user-friendly tutorial, we will walk you through the steps to seamlessly utilize Silhouette files in Cricut Design Space. By following our instructions, you’ll be able to expand your design possibilities and make the most out of your creative projects. Let’s dive right in and get started on this simple and efficient tutorial to unlock the compatibility between Silhouette files and Cricut Design Space. Let the crafting journey begin!
Before we begin make sure that you have unzipped your purchased files to your computer.
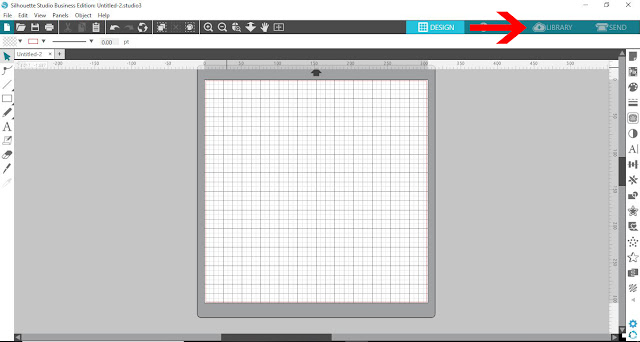
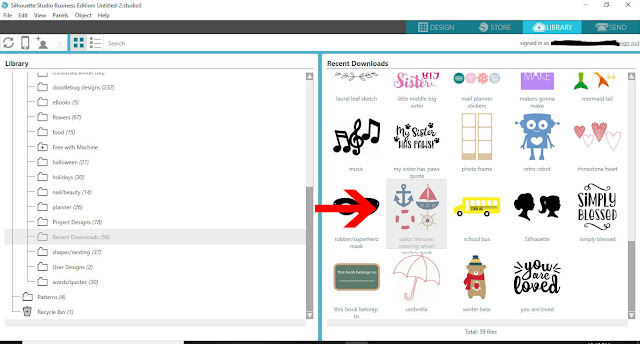
1- Open Silhouette. Click on library.
2- Find the silhouette file you would like to use in Cricut Design Space. Double click on it.
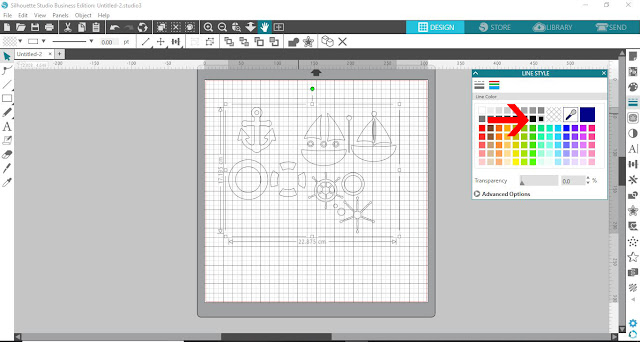
3- The file will appear in the work area. Click on the line style tool.
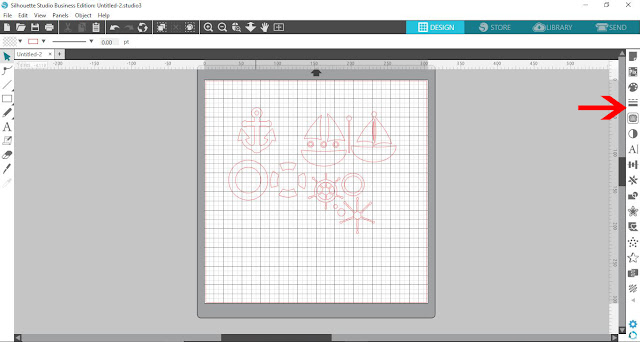
4- Select the line fill to black.
5- Click on the fill tool. Fill with black.
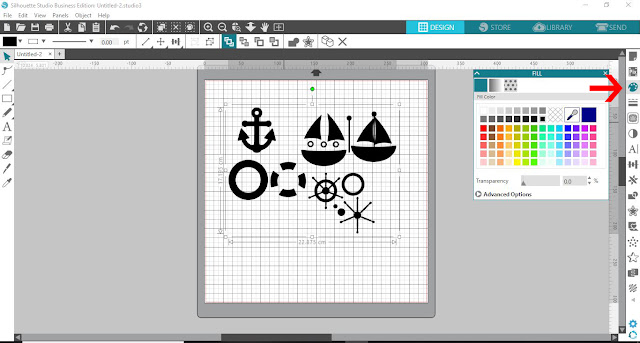
6- Select the page setup icon. Click on the grid options.
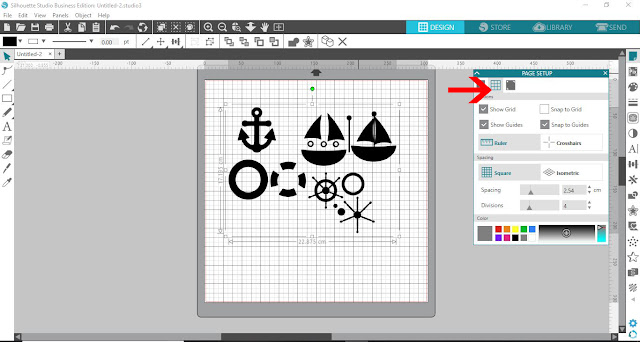
7- Remove the grid lines.
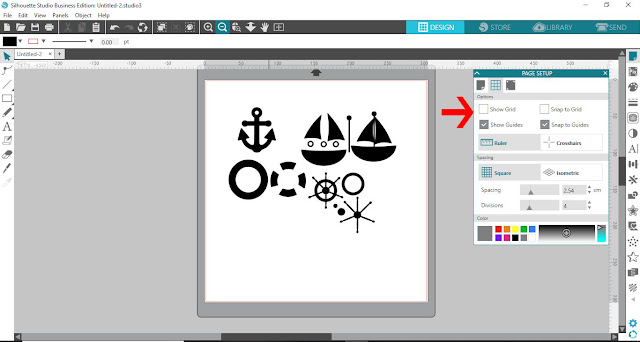
8- Take a screen shot of the design. Save the file as a jpeg.

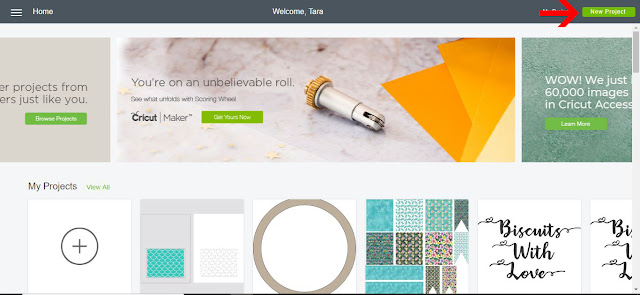
9- Open Cricut Design Space. Click on new project.
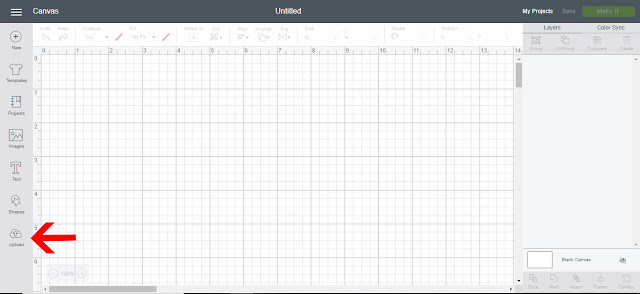
10- Select the upload icon.
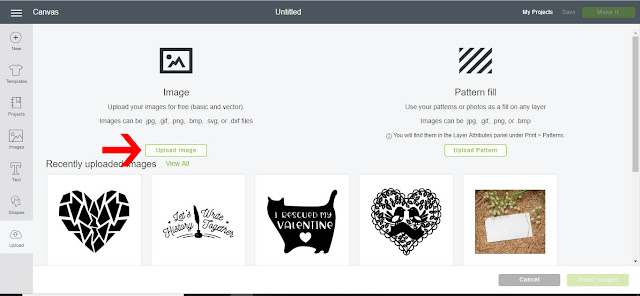
11- Click on upload image.
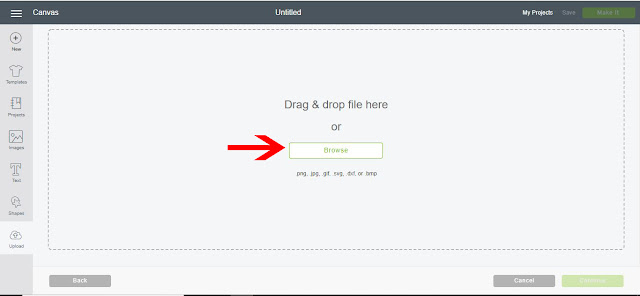
12- Click on browse. Select your screenshot.
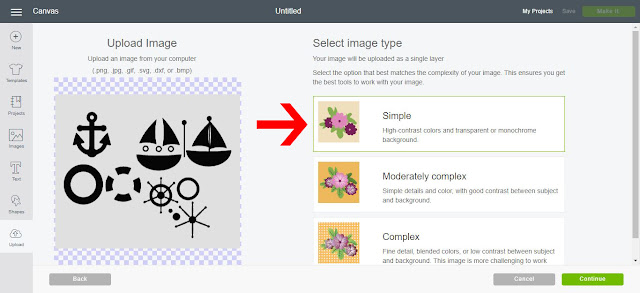
13- The screenshot will appear in your upload image window. Select the simple option and then continue.
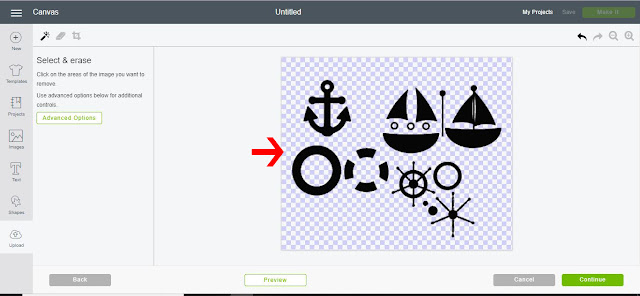
14- Using the wand tool, remove the background from the design. then click continue.
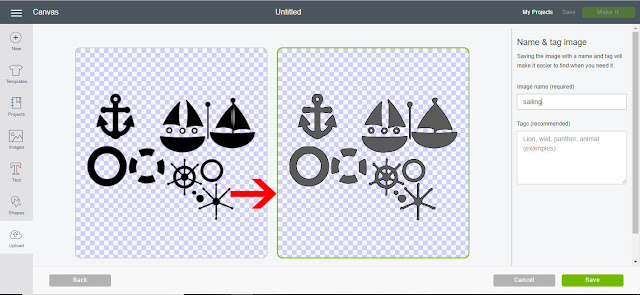
15-You now have 2 options. to print and cut or just import cut files. Select cut files and save.
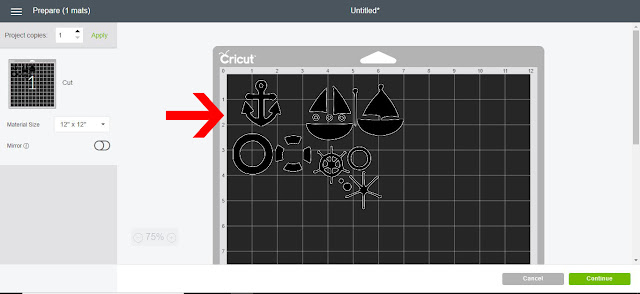
16- The silhouette file is now in the Cricut design space work area. Click on make it.

17- You can now cut the silhouette file in your Cricut machine.