
DIY Tips
Step-by-Step Guide: Using Infusible Ink Pens and Markers on Cricut Apparel Blanks

May
If you’re looking to take your Cricut crafting skills to the next level, you may want to consider experimenting with Infusible Ink Pens and Markers. These innovative tools allow you to create custom designs on Cricut apparel blanks that are both vibrant and long-lasting, without the need for any messy transfer sheets or iron-ons. However, using Infusible Ink Pens and Markers can be a bit intimidating for beginners, which is why we’ve put together a helpful guide to walk you through the process step-by-step. In this guide, we’ll cover everything from selecting the right materials to creating eye-catching designs that will stand the test of time.
Supplies You’ll Need To Get Started
- Cricut smart cutting machine
- LightGrip Machine Mat
- Cricut EasyPress, Cricut EasyPress 2 or Cricut EasyPress 3
- Cricut EasyPress Mat
- Cricut apparel blank (compatible with Infusible Ink)
- Infusible Ink Pens or Markers
- Heat Resistant Tape
- Laser copy paper (2)
- Butcher paper (1)
- Cardstock (80 lb.), White (colored cardstock not recommended)
- Lint roller
- Scissors
- Tweezers
- Design Space software on mobile device or computer
- Cricut Heat Guide or Cricut Heat app (for Cricut EasyPress 3)
Instructions
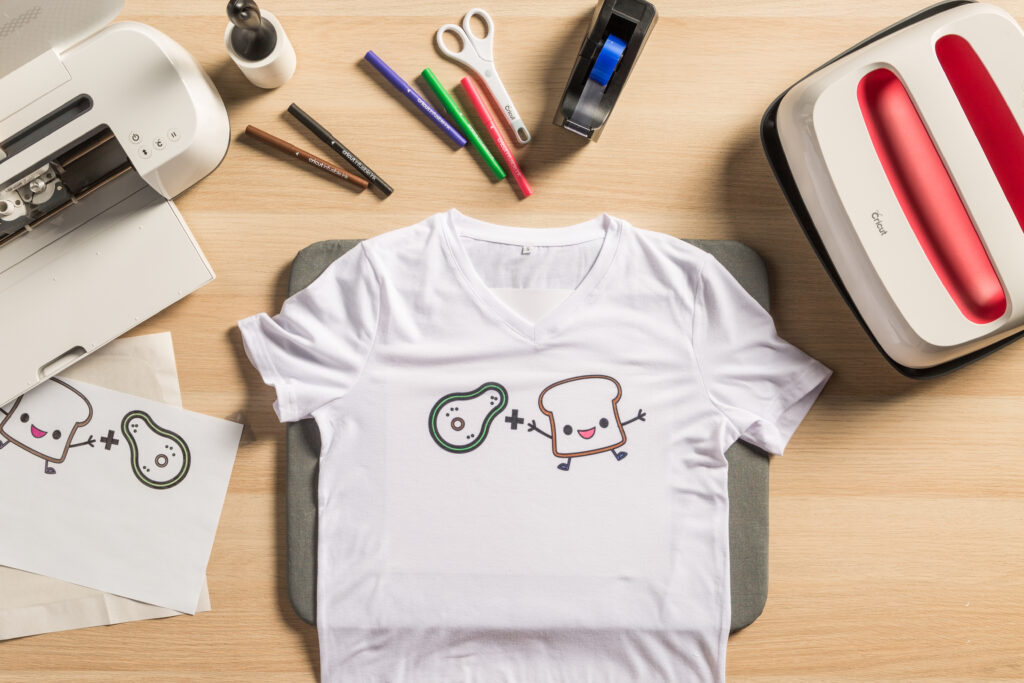
Step 1: Draw
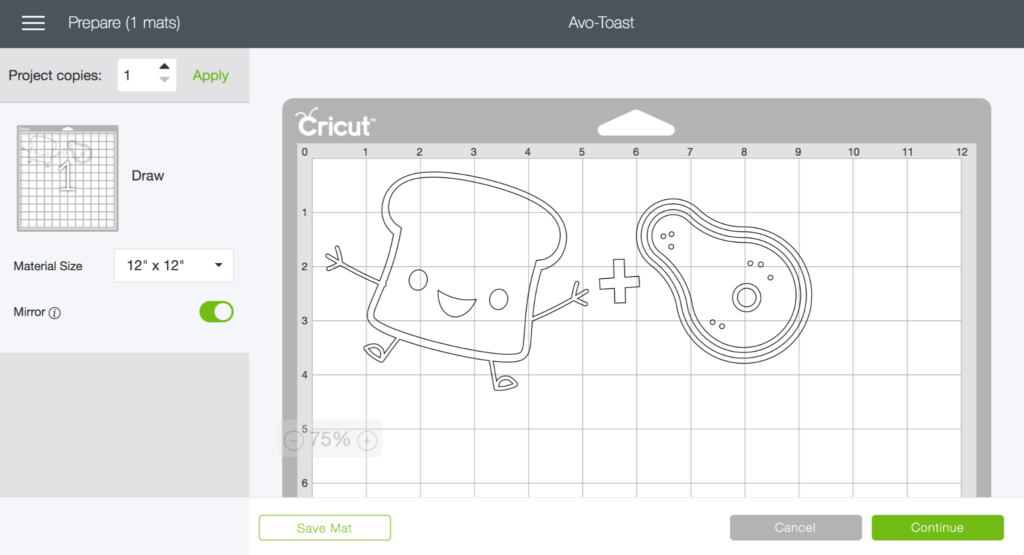
- Place sheet of laser copy paper onto LightGrip Machine Mat and load it into the machine.
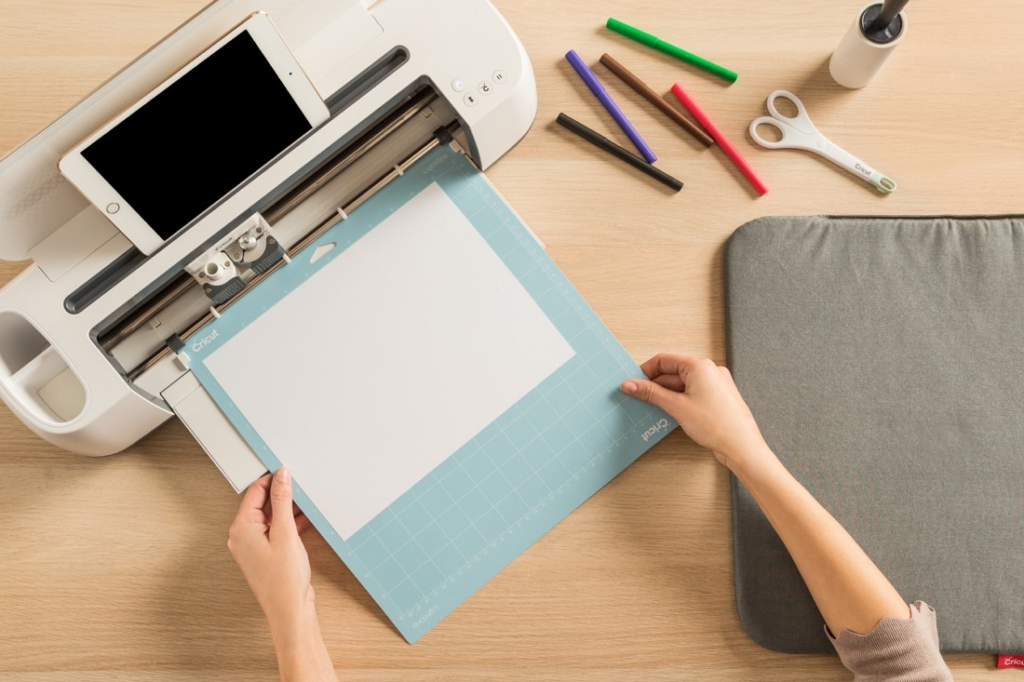
- In Design Space, select and size your design to fit on your apparel blank. Set your Linetype to Draw and assign a pen or marker color. Be sure to Mirror your design.
- Select Browse all materials, then Copy Paper. If using a Cricut Explore Air 2 or older cutting machine, turn Smart Set Dial to Custom first.
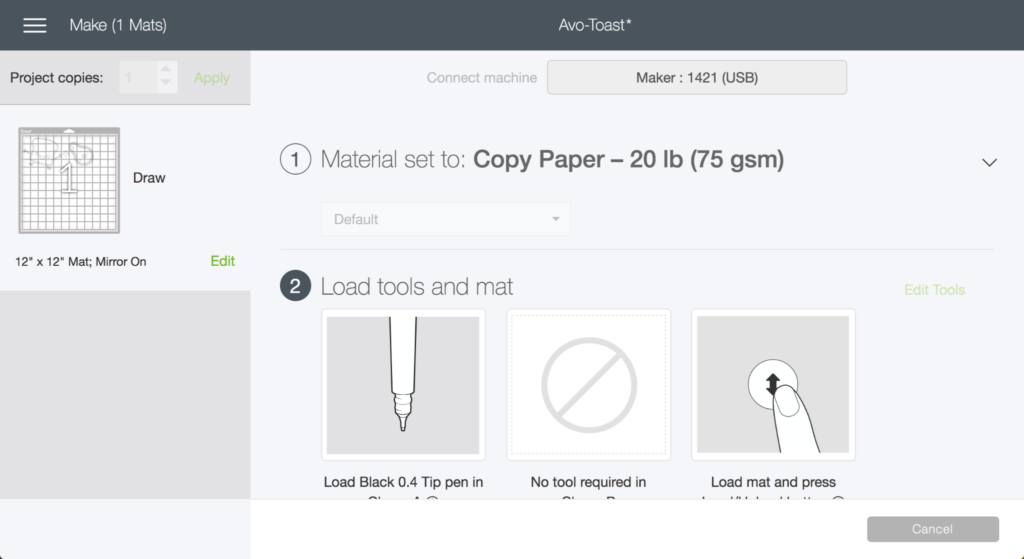
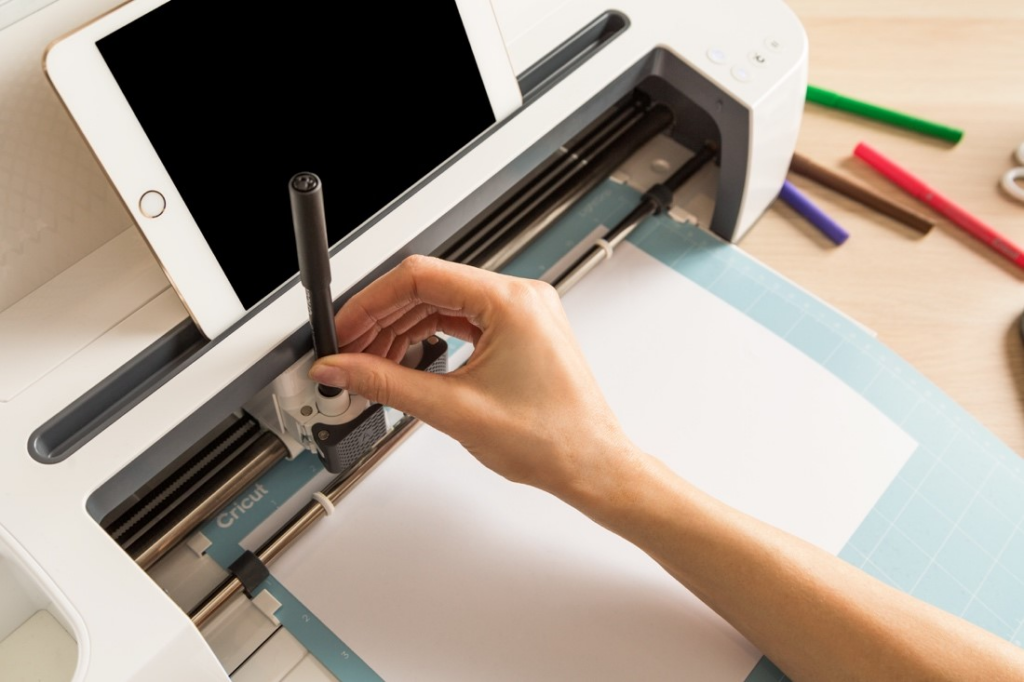
- Insert Infusible Ink Pen or Marker into Clamp A, then press flashing Go button.
( Tip: If you have assigned multiple pen colors to your design, Design Space will prompt you to load specific colors at specific times.)
- Once your design is complete, unload mat.
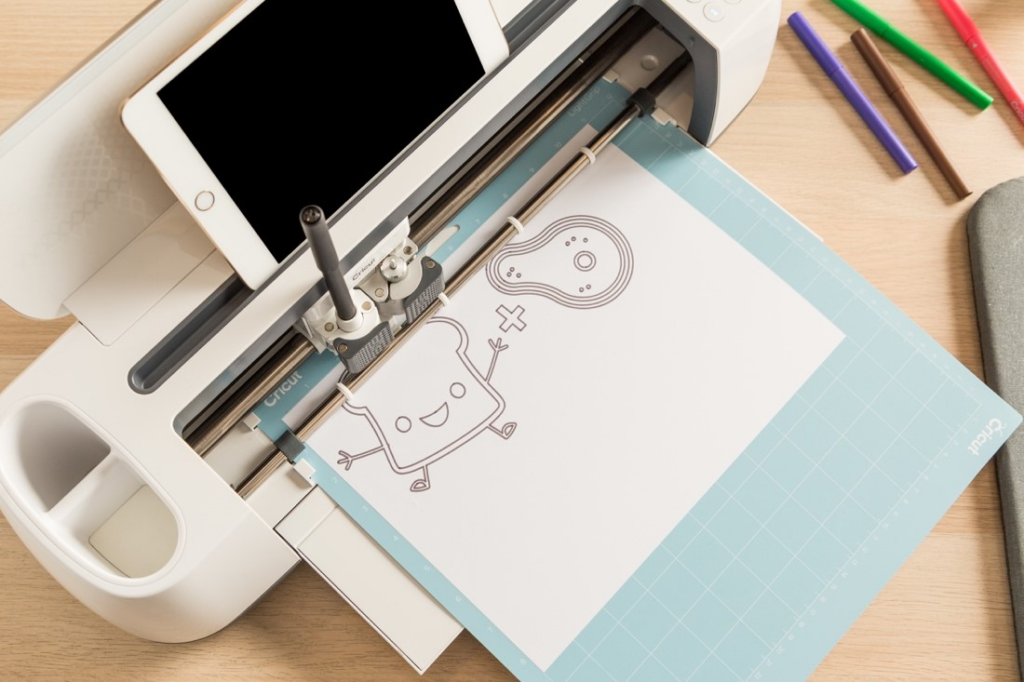
- Remove your design from mat and, if desired, color it in using Infusible Ink Markers or Pens. ( Note: Before handling Infusible Ink materials, be sure that your hands are dry and free of any oils or lotions.)
( Tip: To ensure ink does not bleed through onto your surface, place a second sheet of laser paper beneath your design before coloring.)

Step 2: Apply
( Tip: Now is a good time to prep your Cricut EasyPress. For precise temp, time, and pressure settings for your project, always refer to the Cricut Heat Guide or Cricut Heat app (for Cricut EasyPress 3).
- Place apparel blank on top of Cricut EasyPress Mat.
( Note: When applying designs to baby bodysuit blanks, place small Cricut EasyPress Mat covered with cardstock inside the bodysuit. This helps elevate the application area above the seams so the Cricut EasyPress heat plate can evenly distribute heat to your design. If Cricut EasyPress Mat used inside your blank (i.e. totes, baby bodysuits) is smaller than the Cricut EasyPress heat plate, we recommend using an additional mat under the blank to protect your work surface.)

- Position sheet of cardstock inside apparel to protect your mat and project.

- Do not skip this step: Use a fresh adhesive to lint-roll the entire surface. Even miniscule debris or fibers may create imperfections in the final transfer.

- Cover apparel with butcher paper.
( Important: Butcher paper must be larger than Cricut EasyPress heat plate, Butcher paper comes in each package of Infusible Ink Transfer Sheets.)

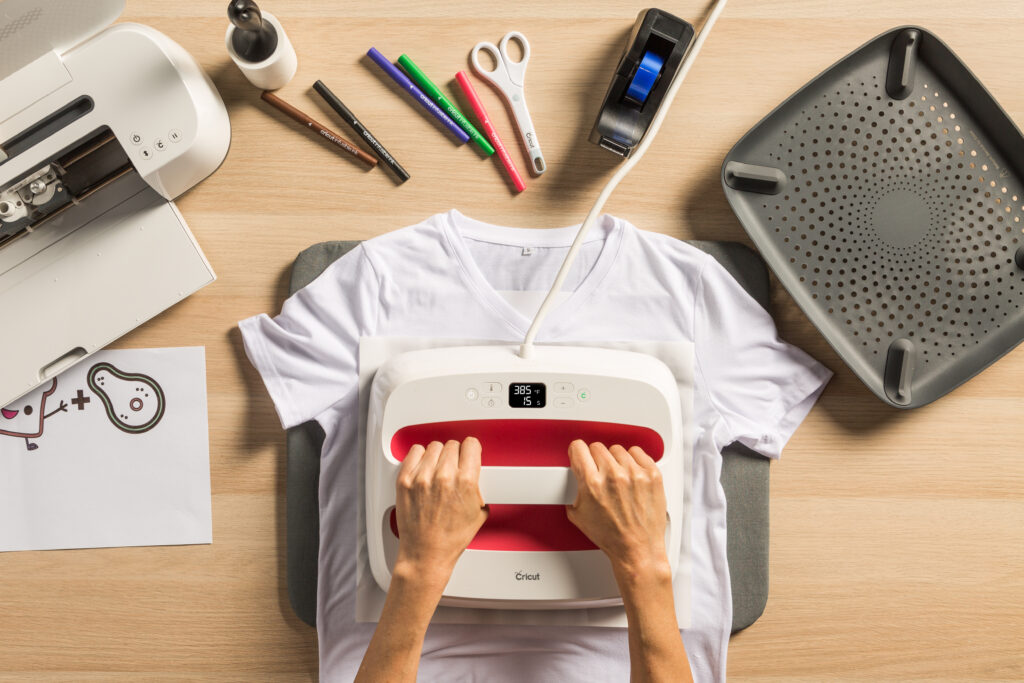
- Do not skip this step. Preheat application area to remove moisture and wrinkles that result in unwanted effects: for time and temperature settings, refer to Cricut Heat Guide or Cricut Heat app (for Cricut EasyPress 3), use even, light pressure.
- Remove butcher paper and let apparel cool completely.
- Place cut design face down on apparel. The side with the drawing should be against the blank.
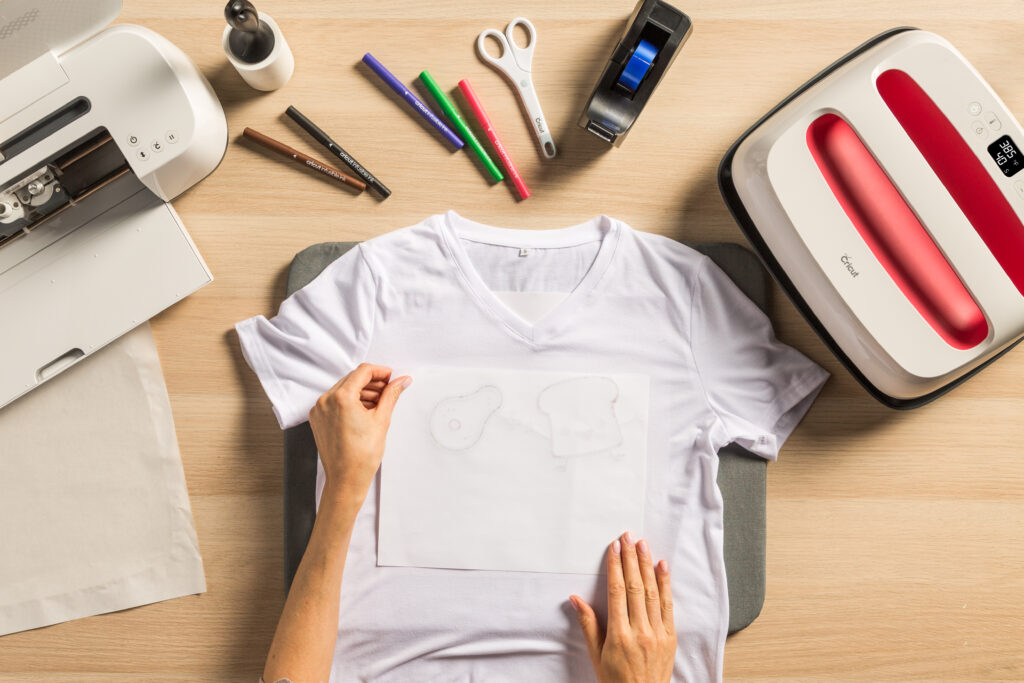
- Tape down each corner of the design using Heat Resistant Tape. This keeps your design from shifting during transfer.

- Place butcher paper on top of design.
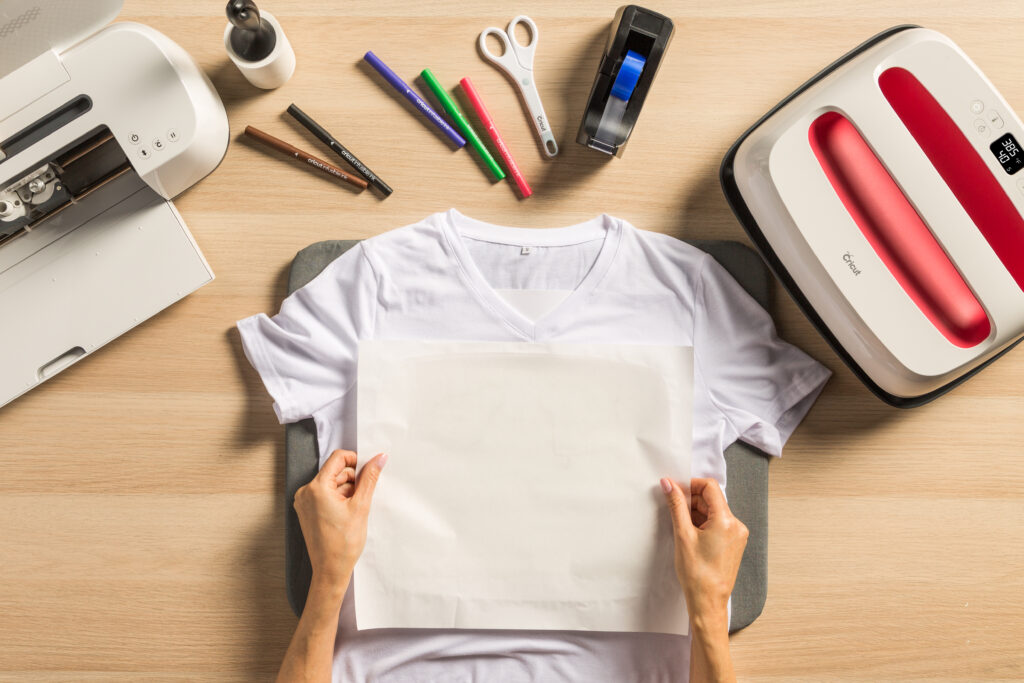
- To find time and temperature settings for your project refer to Cricut Heat Guide or Cricut Heat app (for Cricut EasyPress 3).
( Important: Avoid seams when placing Cricut EasyPress. If the heat plate crosses over seams, the design will not receive even heat, resulting in an unwanted transfer effect, Do not slide press or move your hands during transfer. Keep the stack as still as possible while pressing. )

- When beep sounds, slowly lift press. Try not to move the stack, including butcher paper.
- Let project cool completely. Then slowly remove butcher paper, tape, and design.
( Tip: Never reuse butcher paper for another project! )

- Enjoy!
Care
- Machine wash inside out with cold water and mild detergent
- Tumble dry low or line dry
- Do not use fabric softener, dryer sheets, or bleach
We hope that our above guide on how to use Infusible Ink Pens and Markers on Cricut Apparel Blanks will be helpful to you. We understand that this process can seem daunting, but with the right tools and techniques, you can create stunning designs that are both vibrant and long-lasting. Thank you for taking the time to read our guide, and we wish you all the best in your Cricut crafting endeavors.